
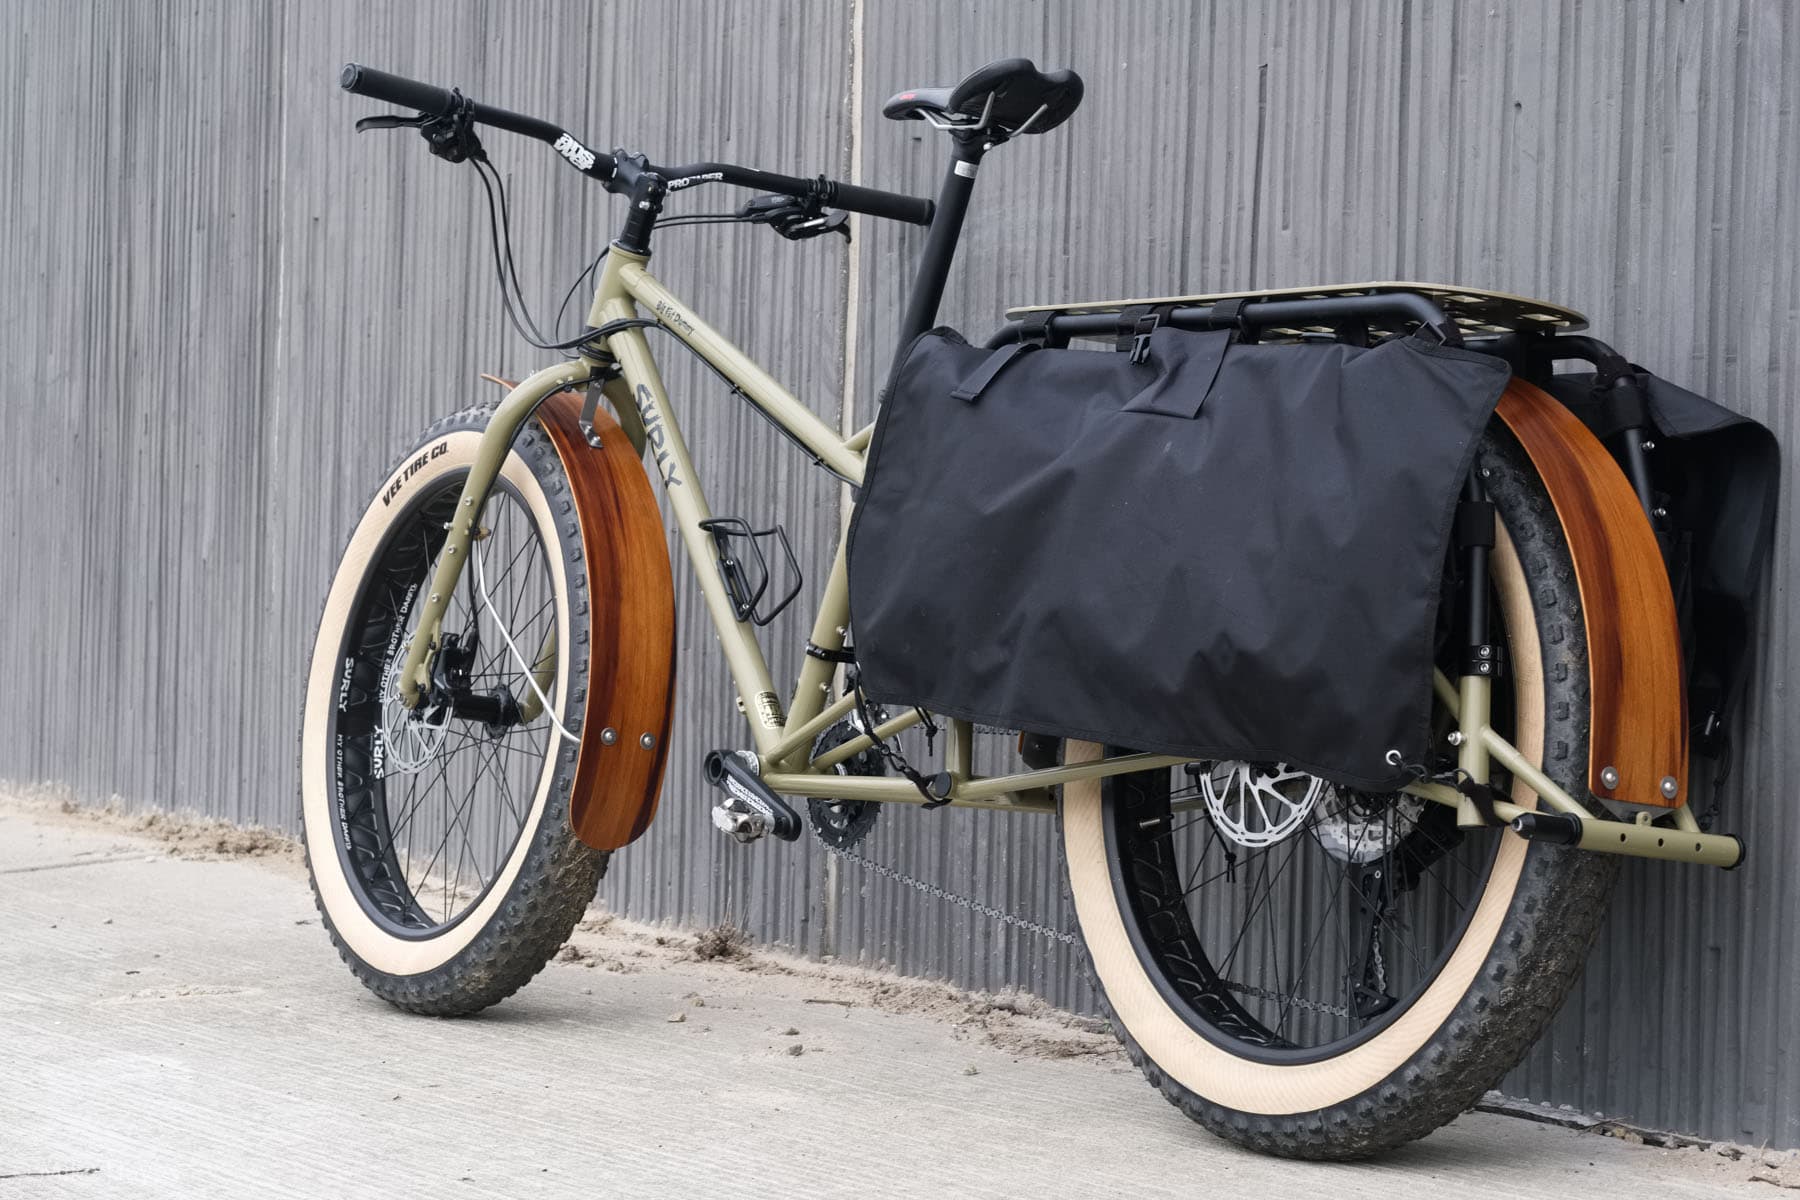
When I was younger my cycling peers and I considered mudguards on a bike to be deeply uncool. From an early age my father was very fond of the idea that I should always have a sensible bike so it was much to his chagrin that mudguards would be removed in attempt to make them look racier. Subsequently all through university and the early days of my ‘racing career’ it was considered preferable to return home from a winter chain-gang plastered in shit head-to-toe from our collective wheels and rural lanes. At the time I suspect I would rather have ridden around on a pink girls bike with ribbons tied to the handlebars than have mudguards ruining the lines of my race bike, although that hypothesis was never put to the test. With age however comes, very (very) occasionally, wisdom and these days I would not consider navigating the sloppy winter roads around here without them. To that end then my Surly Big Fat Dummy needed some, and being something of a niche bicycle there isn’t much available to buy. That is not necessarily a bad thing I think as often it is just too easy to keep on mindlessly buying stuff when perhaps a more considered approach brings greater rewards. To that end, and given that it’s been a long time since I wrote anything here that might actually be considered useful to someone, then here’s a bit of a project I had some fun with that may come in handy if your Dummy needs fenders too…

Originally I thought I would mould the mudguards in carbon as it’s been a while since I made anything in carbon, much less wrote about it, and it is fun, but it also generates a phenomenal amount of waste in the form of single-use plastics – bagging film, breather material, peel ply and so on so instead I thought it might be interesting, and a little more environmentally responsible, to work with wood for a change, in the form of laminated veneers. It took me a few weeks, including a lot of thinking time, but the end result does look rather fabulous I think – humble opinions and all that. Rather than a wordy step by step I took a few photos during construction that I can use to illustrate my process as well as a few things to think about if doing something similar.
The Former
If making a skinny set of road or touring bike mudguards then the mould, or former, would be a simple process of cutting a crescent to the desired radius from a slab or two of MDF of the requisite thickness and then using a bunch of off-the-shelf clamps to hold the veneers while the glue sets. The Big Fat Dummy mudguards however are so wide I needed something a little bit more involved so I knocked together a half moon-shape of the radius I needed (roughly the radius of wheel + tyre + an extra inch for mud clearance). It looked like this…
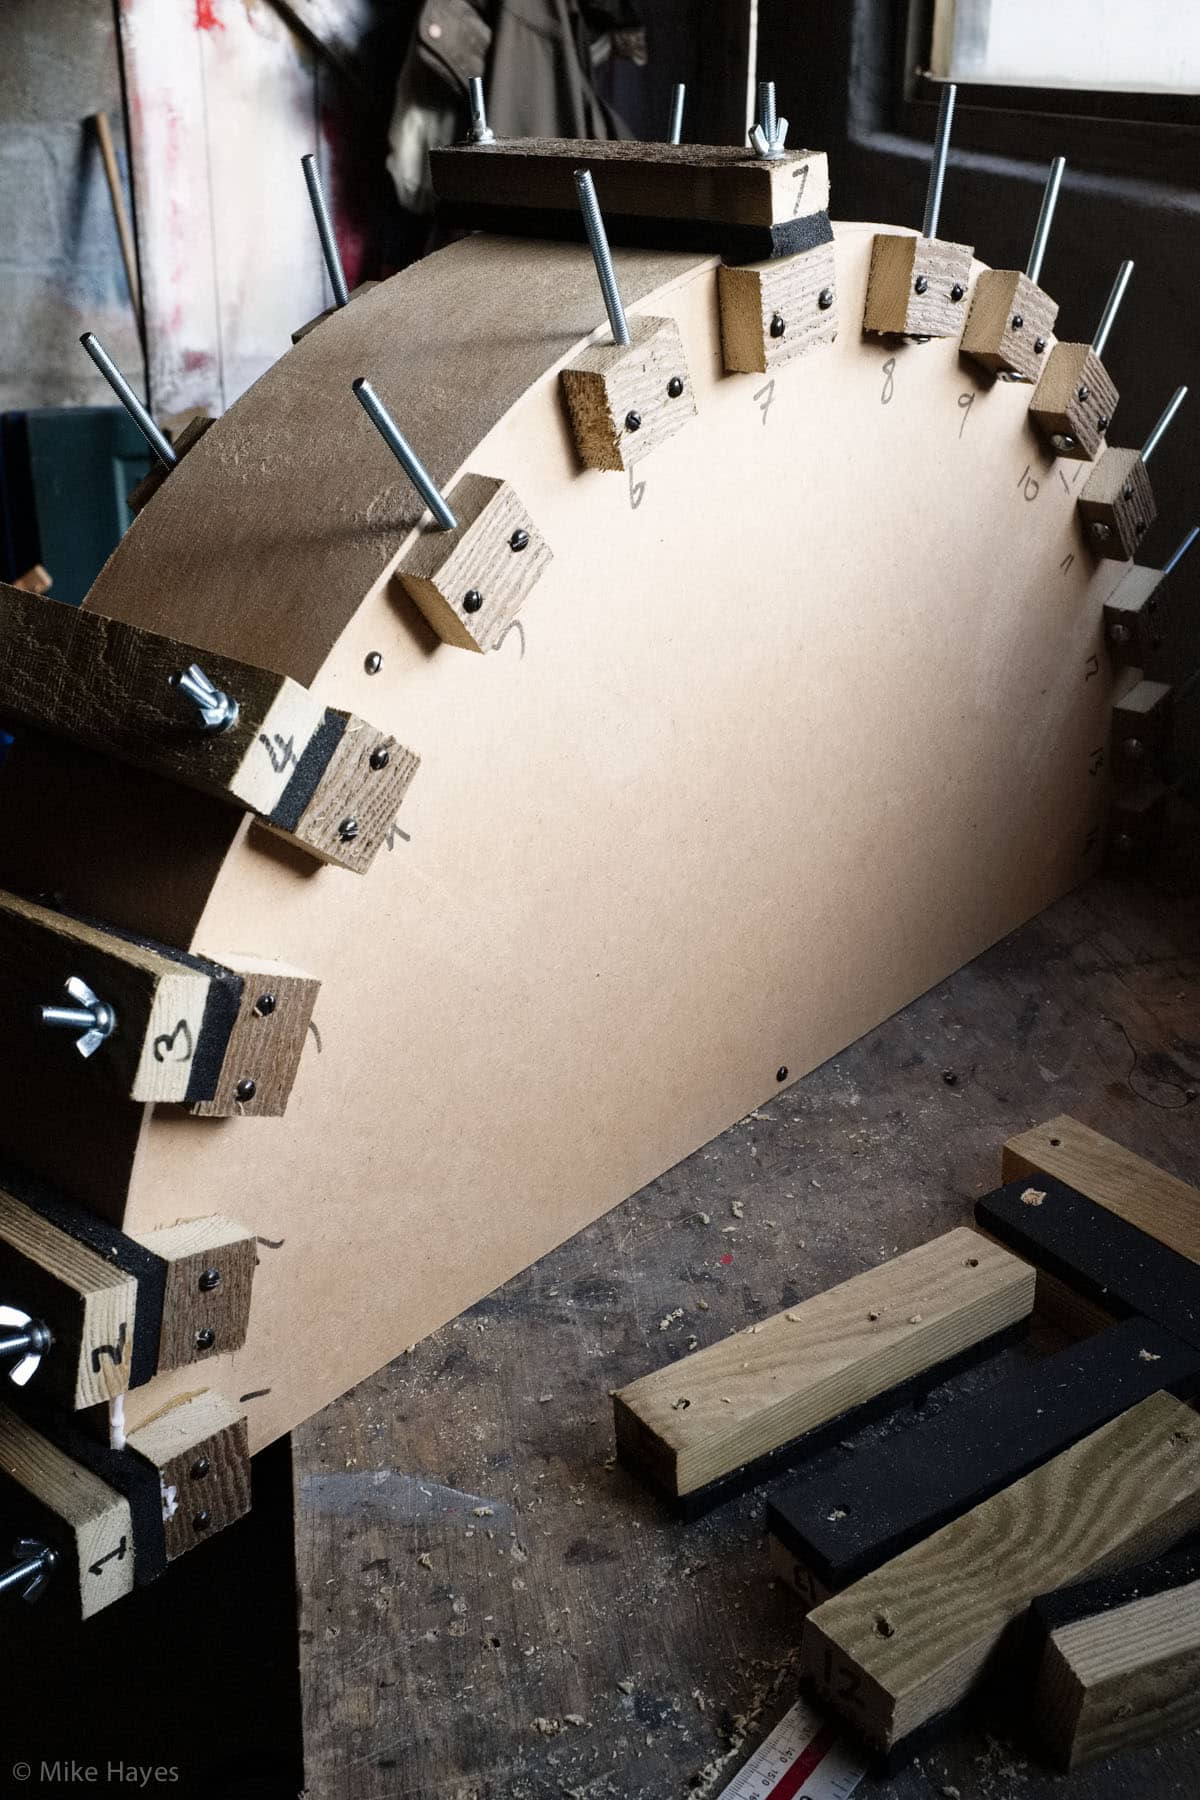
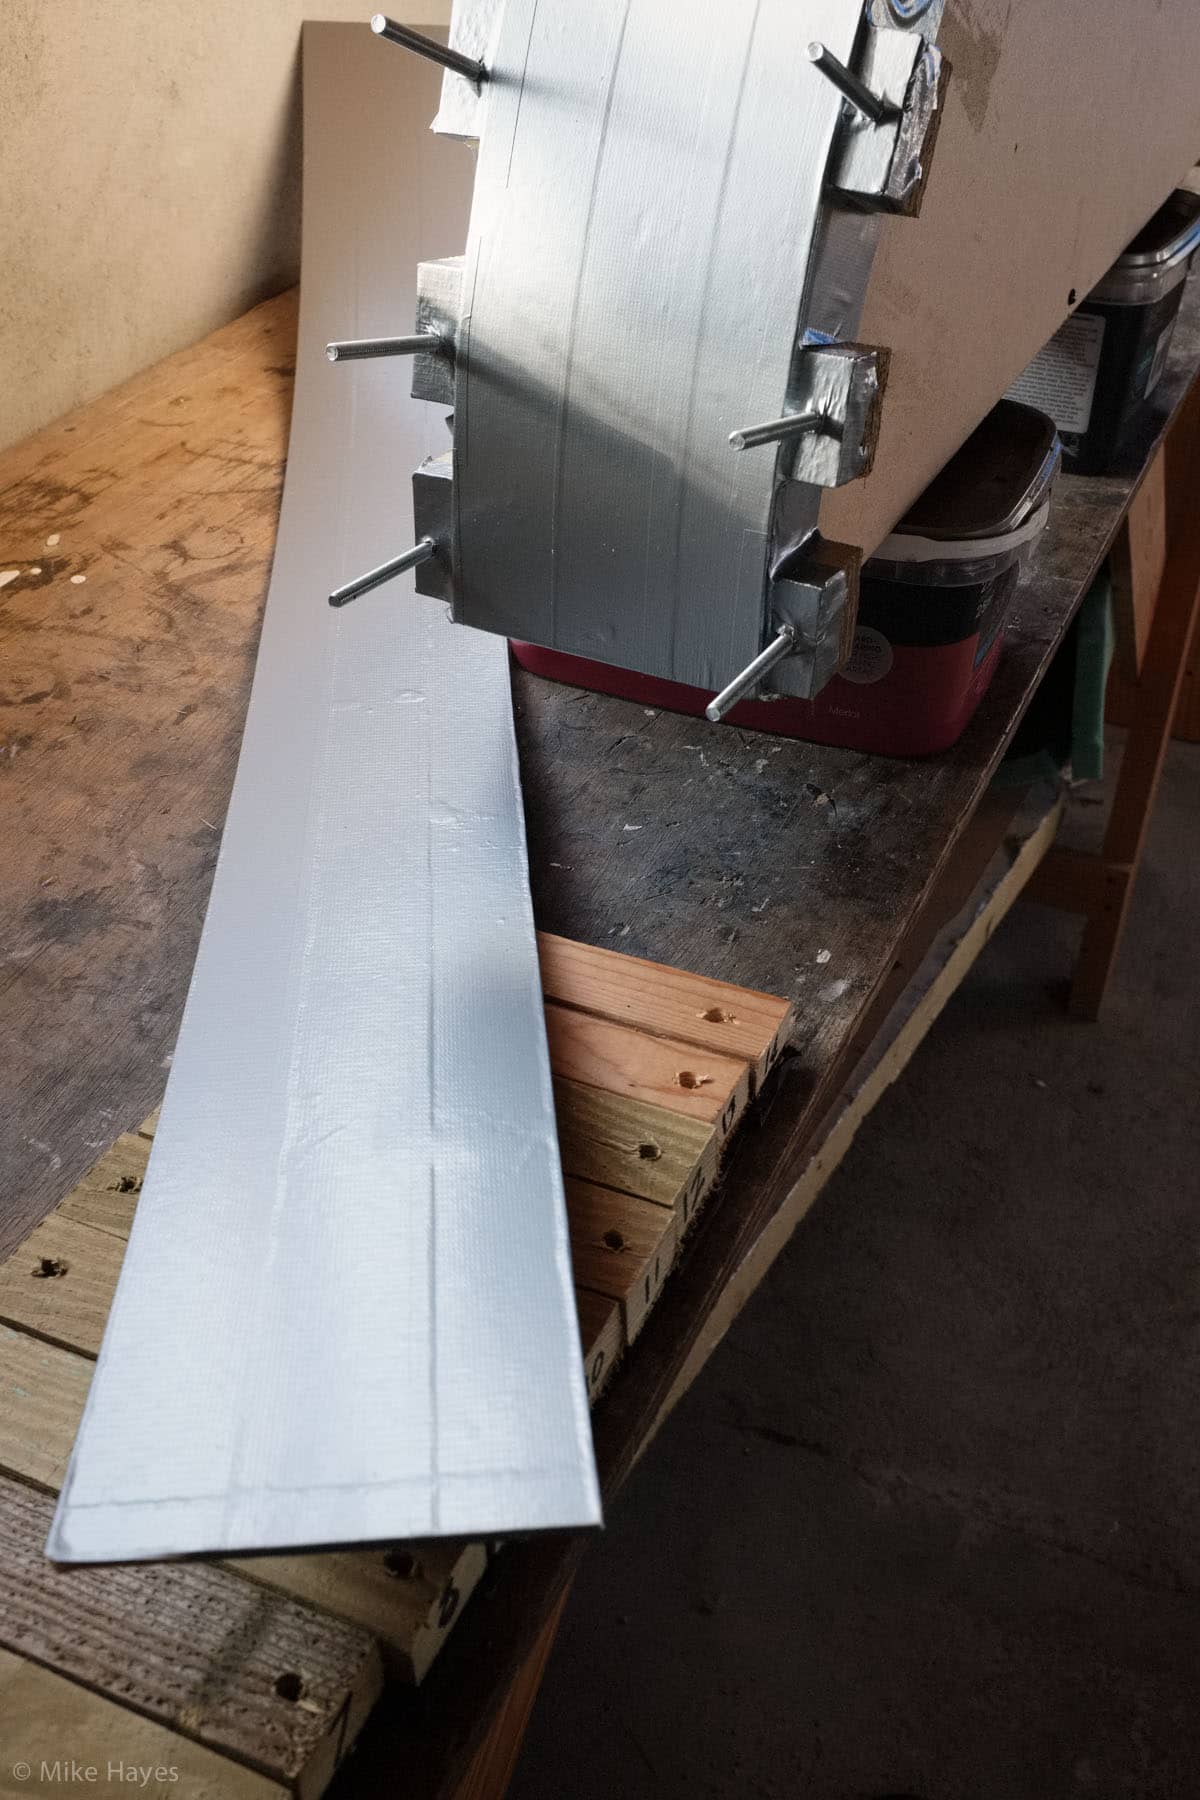
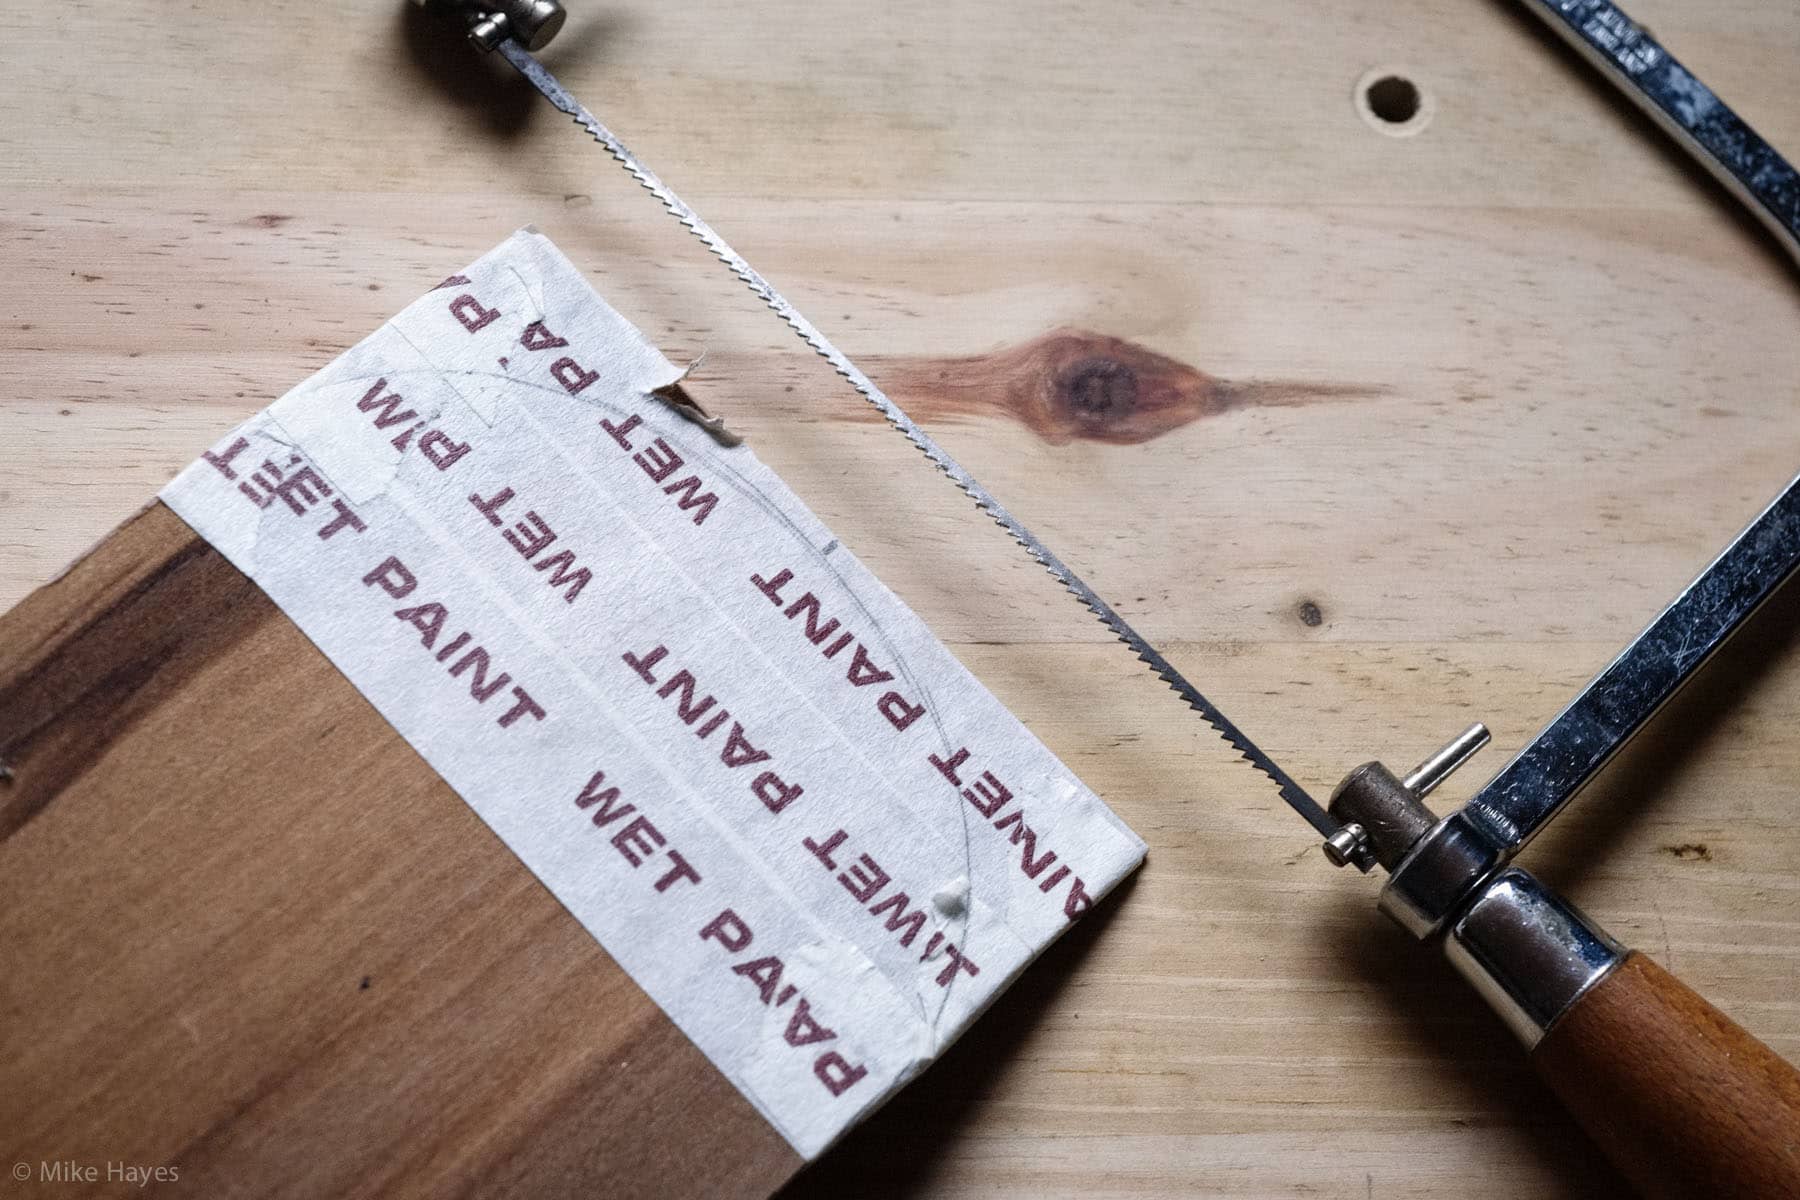
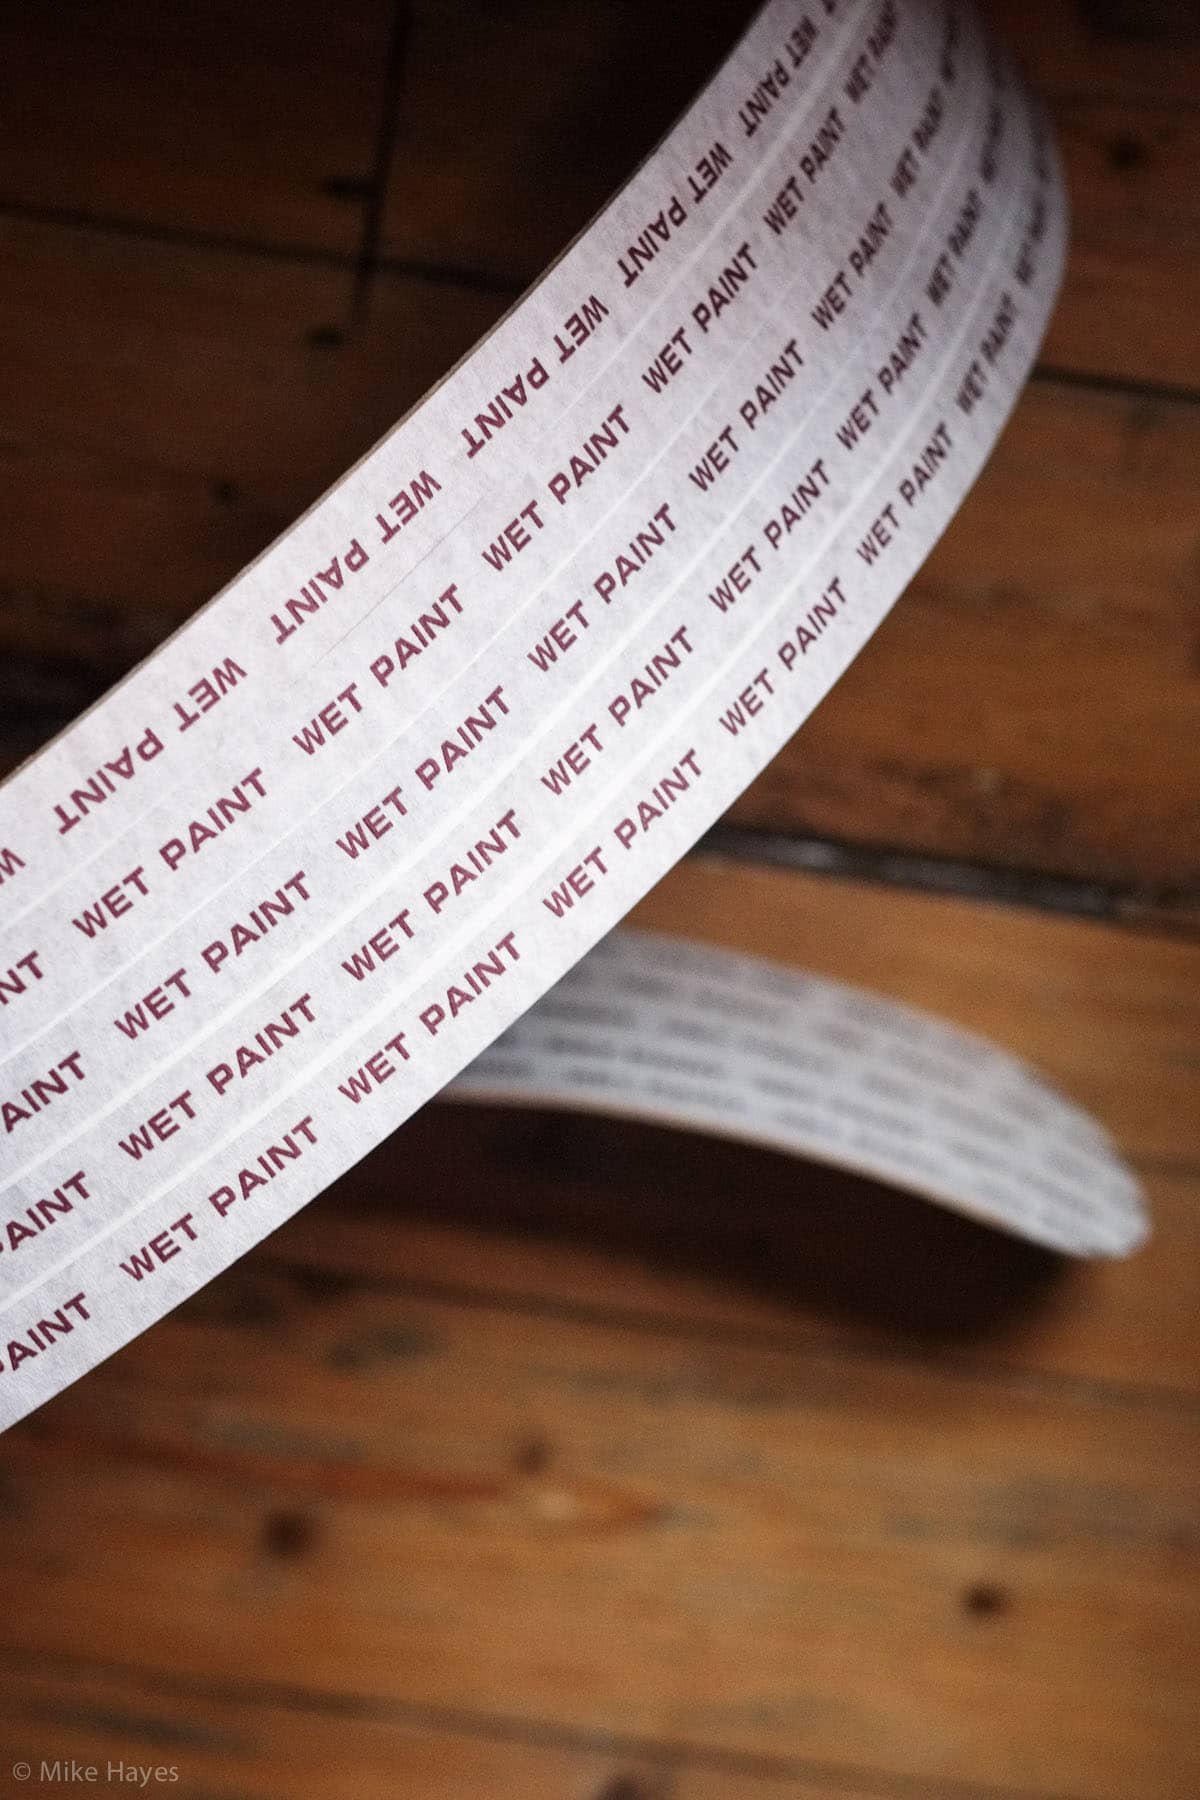
The sides are 1/4″ thick MDF, the curved top simply a wrap of hardboard. There are crosspieces inside cut from scrap timber and the whole lot is glued and screwed together. The clamps are just more bits of timber from under the bench with a bunch of roofing bolts + wingnuts from my local hardware store. I had some 1/4″ thick self-adhesive foam rubber kicking around (left over from kayak outfitting) so the clamp crosspieces have some of that stuck on by way of spreading the clamping force. There is also a further strip of hardboard to sit between the laminate and the clamps to distribute the clamping force evenly. Happily for this sort of the thing the mould can be rough as you like so long as it’s dimensionally accurate and true. Unlike making moulds for composite work it doesn’t require hours and hours of finishing.. with wood much of the final finish quality is determined by the work put in at the end of the process, whereas composites moulding requires all that work to be done at the mould-making stage. In fact the only kind of finish required on the former here is a covering of gaffer tape to stop any stray glue sticking the laminate the mould itself…
Happily the radius required for the dummy wheels with 4″ rubber fitted is about the same as that required for a 700C wheel with a 40C tyre on… so I rather suspect my Surly Cross Check, and possibly my Allday might also be sporting some arboreal accessories before too long.
Laminating The Veneers
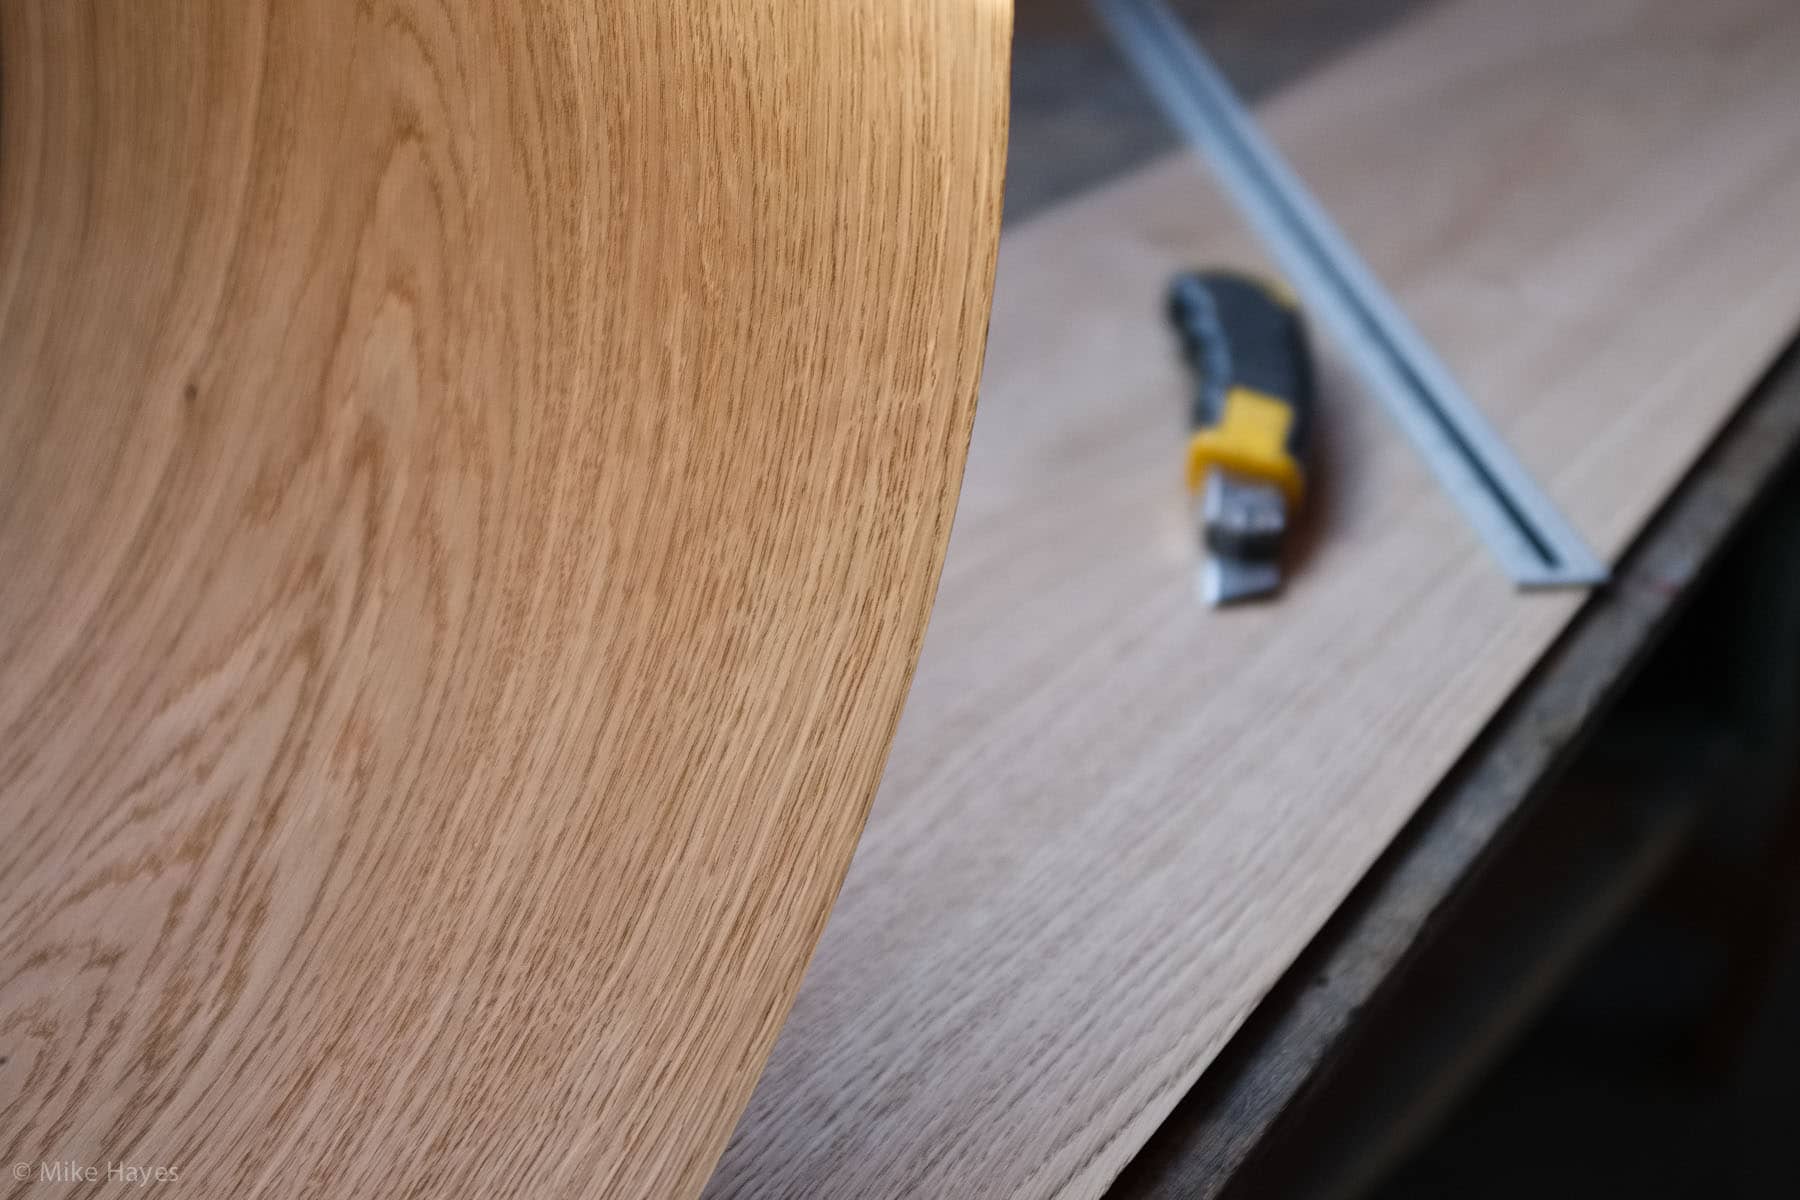
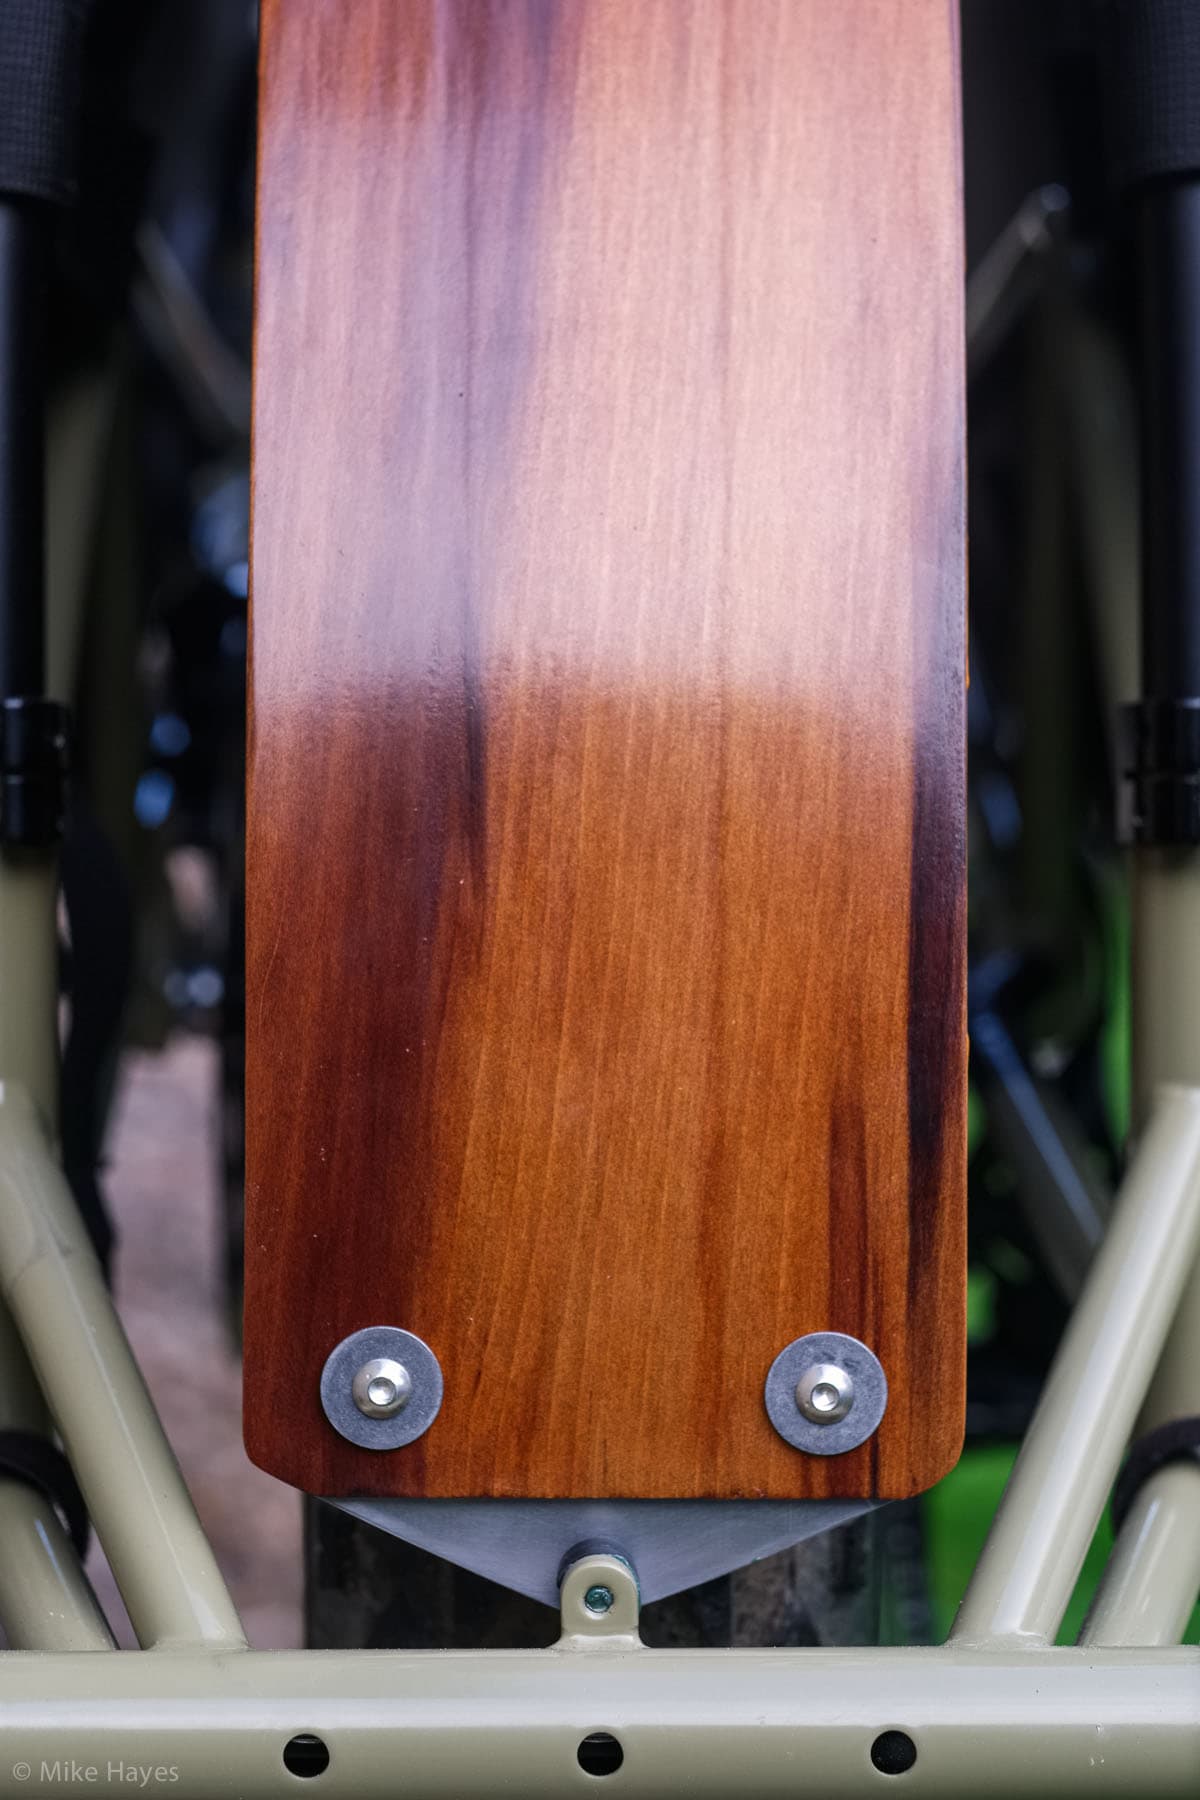
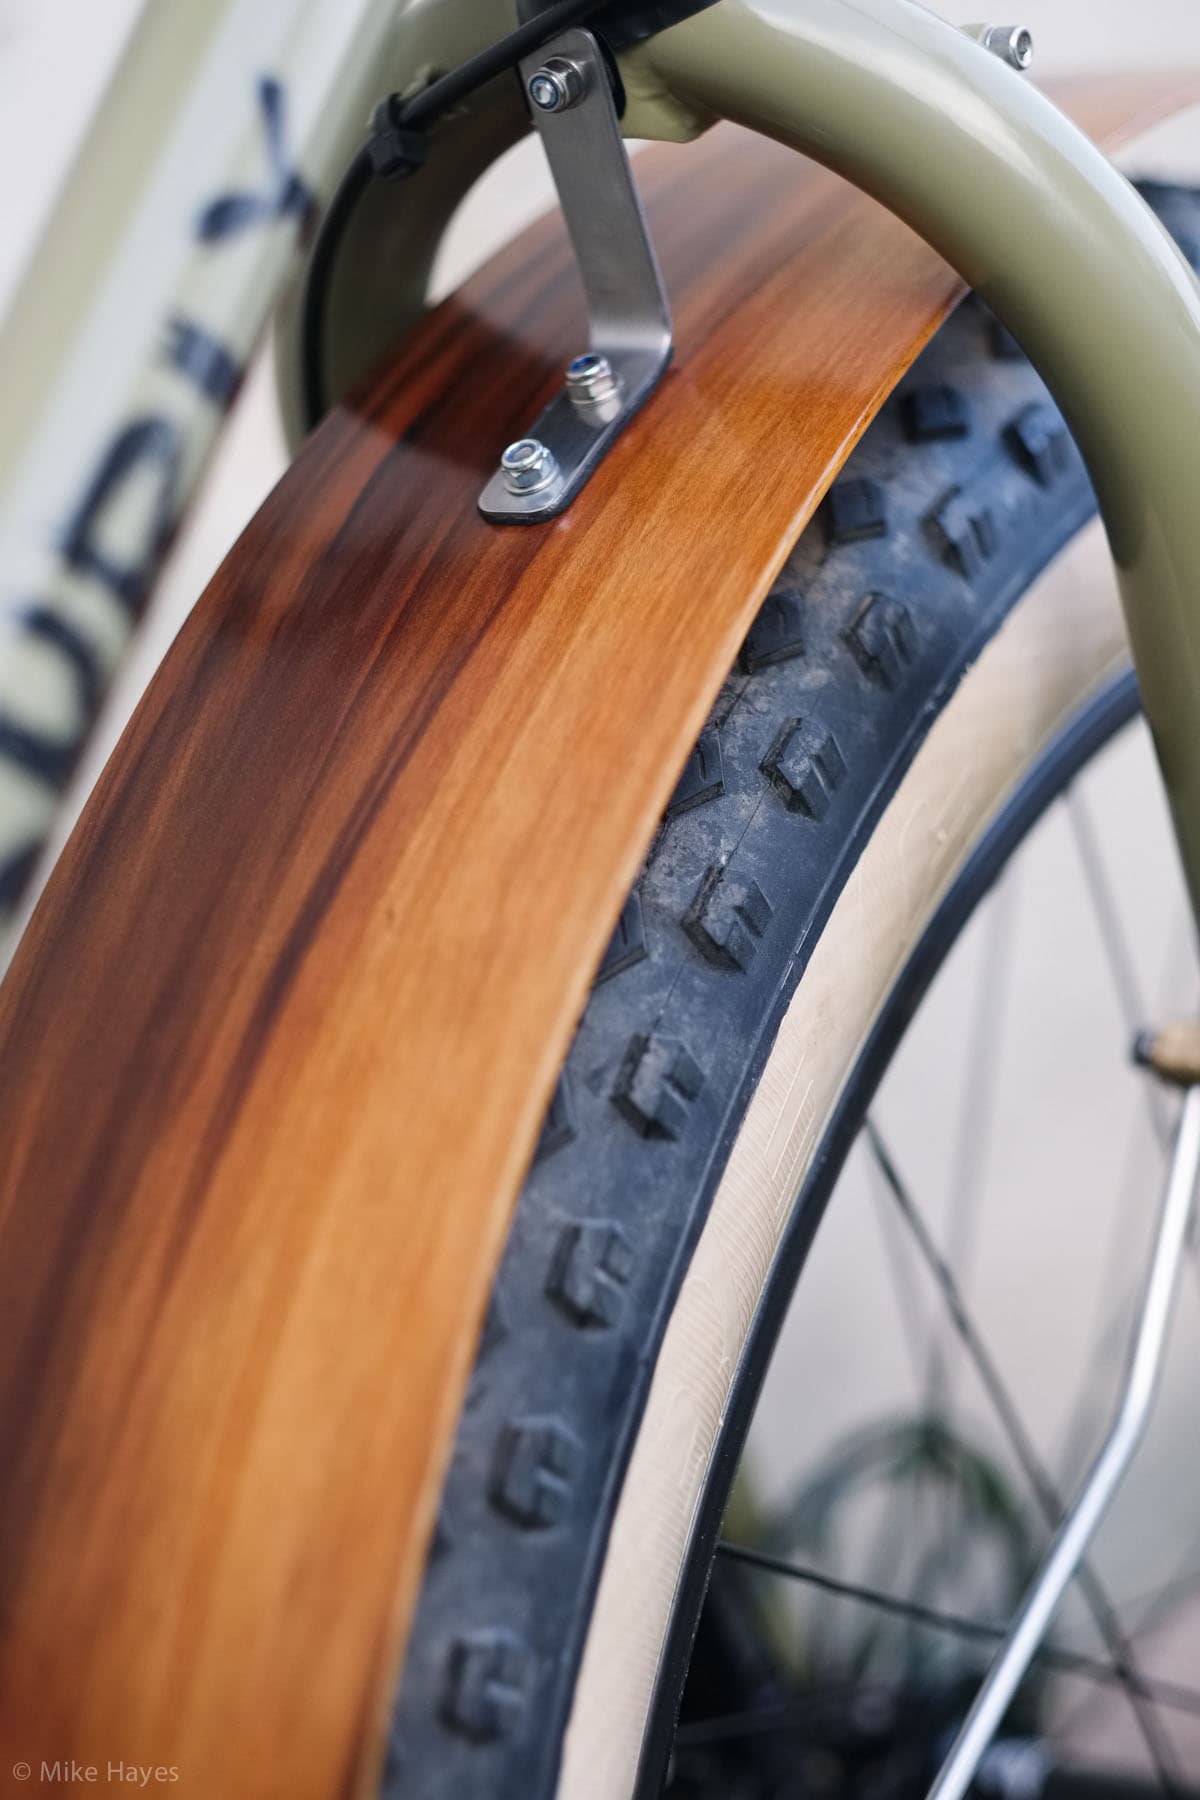
The actual laminate consists of four layers of oak veneer at 0.6mm thick per layer, and a finishing layer of smoked red gum at around 0.5mm thick. Neither of those are the cheapest choice but I figured oak would make a good structural choice – strong and rot resistant, and the red gum just looked beautiful. The oak I did find at a bit of a discount as it had some surface imperfections I didn’t really care about; two pieces at 280cm x 25cm each was enough to do both guards (the guards are 12cm wide and the rear has a ‘half-circumference’ of just over 120cm). Pine veneers would have been much cheaper but I have no idea how durable they would prove to be, and besides pine doesn’t have such an attractive grain pattern.
I bought my veneers from these guys; they have a super range of decorative veneers to choose from. Ebay is also worth a look as sometimes seconds or slightly damaged veneers are cleared on there.
I spent quite a lot of time thinking about glue choice. Ordinary PVA wood glue won’t do – it is likely to creep such that the curve won’t be properly permanent, and may also delaminate. In the end I went with Cascamite powdered resin glue as I had prior experience of it and the working time once mixed is very generous. You could equally use a 2-part urea-formaldehyde resin; Aerolite 306 is well regarded, or my boat building mate says epoxy thickened slightly with colloidal silica would probably work just fine. Cascamite happens to be the cheapest of the bunch however and is dead easy to use as well as not being particularly toxic.
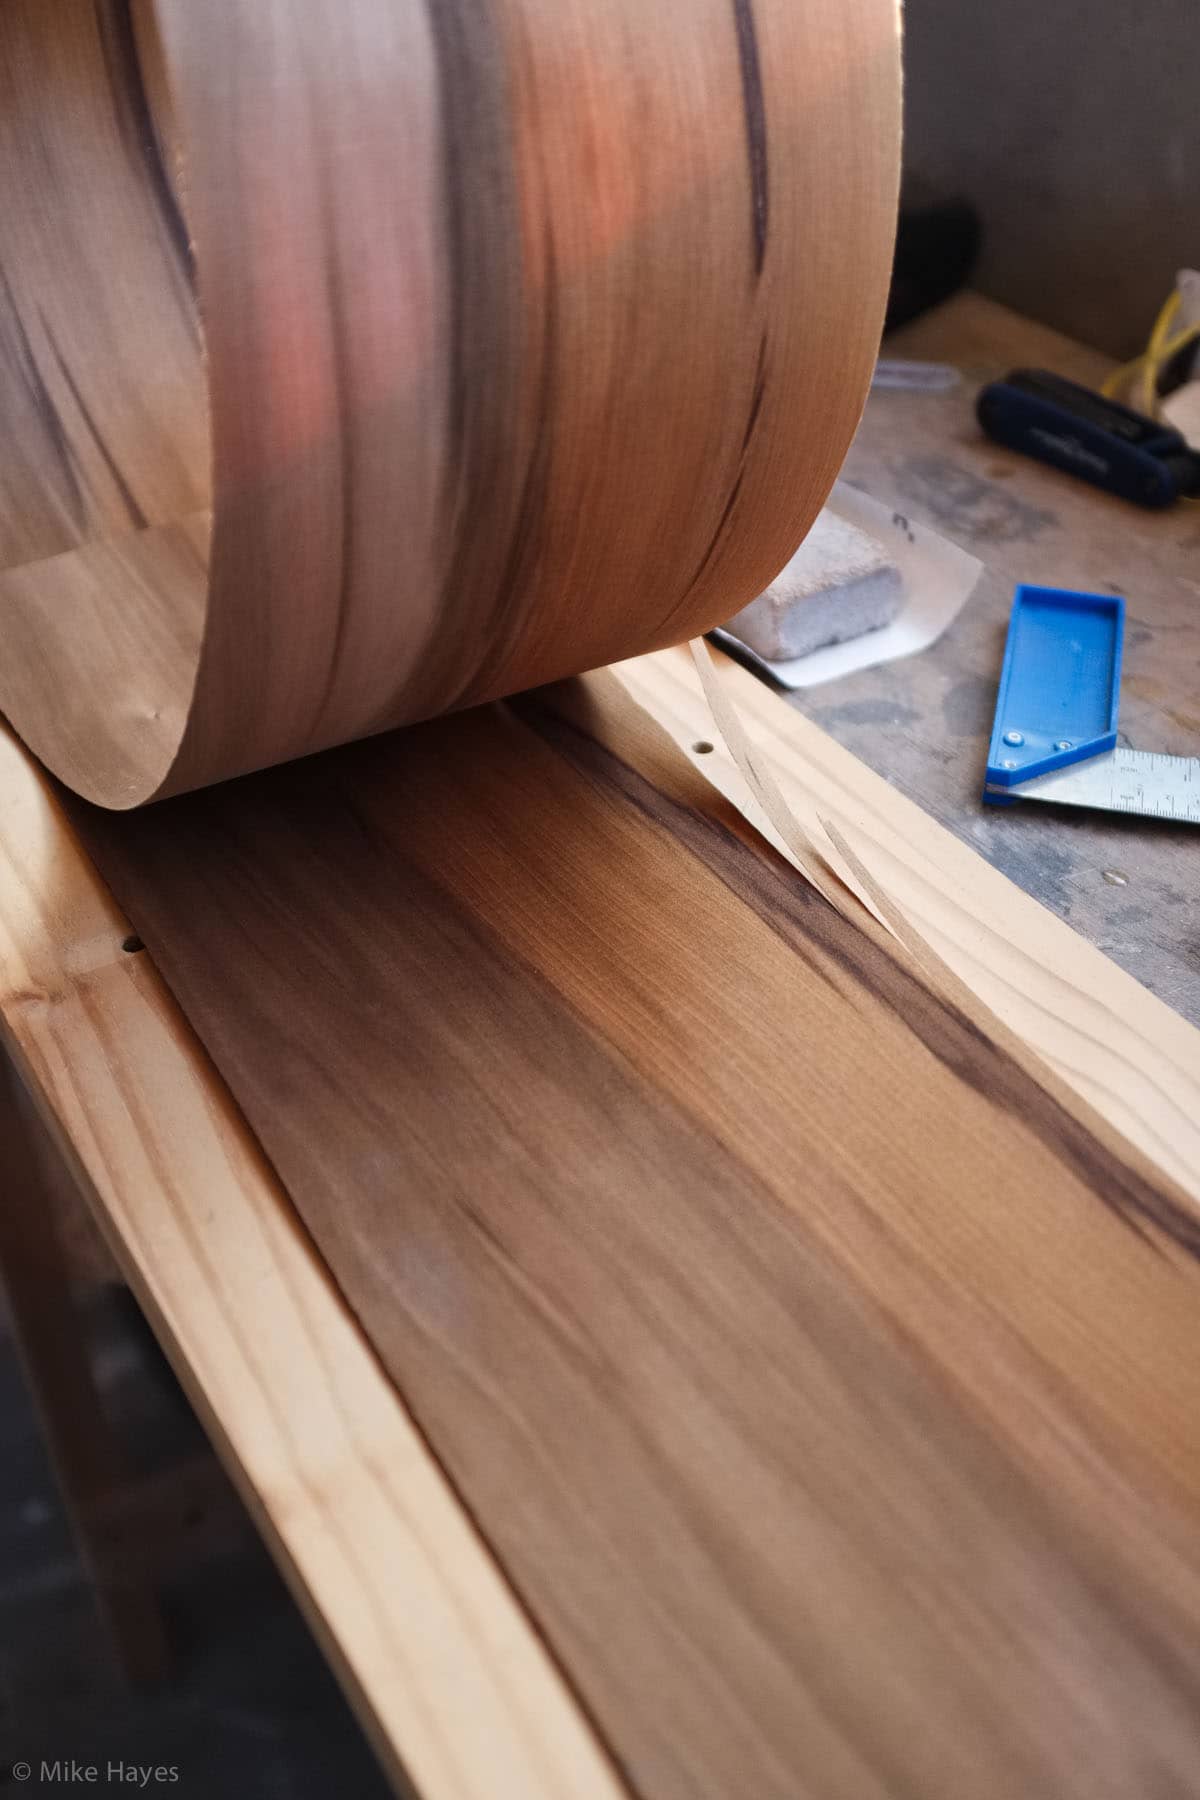
I laminated the four layers of oak flat on the bench using a soft pad to smooth each layer on before draping over the form. The layers will slide over each other to accommodate the gradually increasing radius from inside to outside layer so start the drape in the center of the form and then smooth over working towards the ends. I put the outer layer of gum on once the rest was on the form to try and avoid getting gluey fingerprints all over it; again smoothing down with the pad working outwards towards the ends.
I laminated the rear guard first as my ‘learning piece’ as that is largely hidden by the deck so I figured any cock-ups leaving it less than cosmetically perfect would be largely invisible. Sure enough I did mess up, but only a tiny bit. I used too much clamping force which left a couple of just visible flat spots in the curve of the finished moulding. It’s barely noticeable but worth taking note not to clamp it up too tight. Lots of clamps with light pressure is best. The rear also developed a minor twist at one end a few days after removing it from the former. I’d left it clamped for 24hrs to make sure the glue was properly hard but I think the veneers probably took on some moisture content from the glue which subsequently dried out warping the laminate. I was able to steam the twist out easily however so no harm done. With those lessons learned then the front moulding was done with just a light clamping force and 3 days in the former… and turned out absolutely perfect.
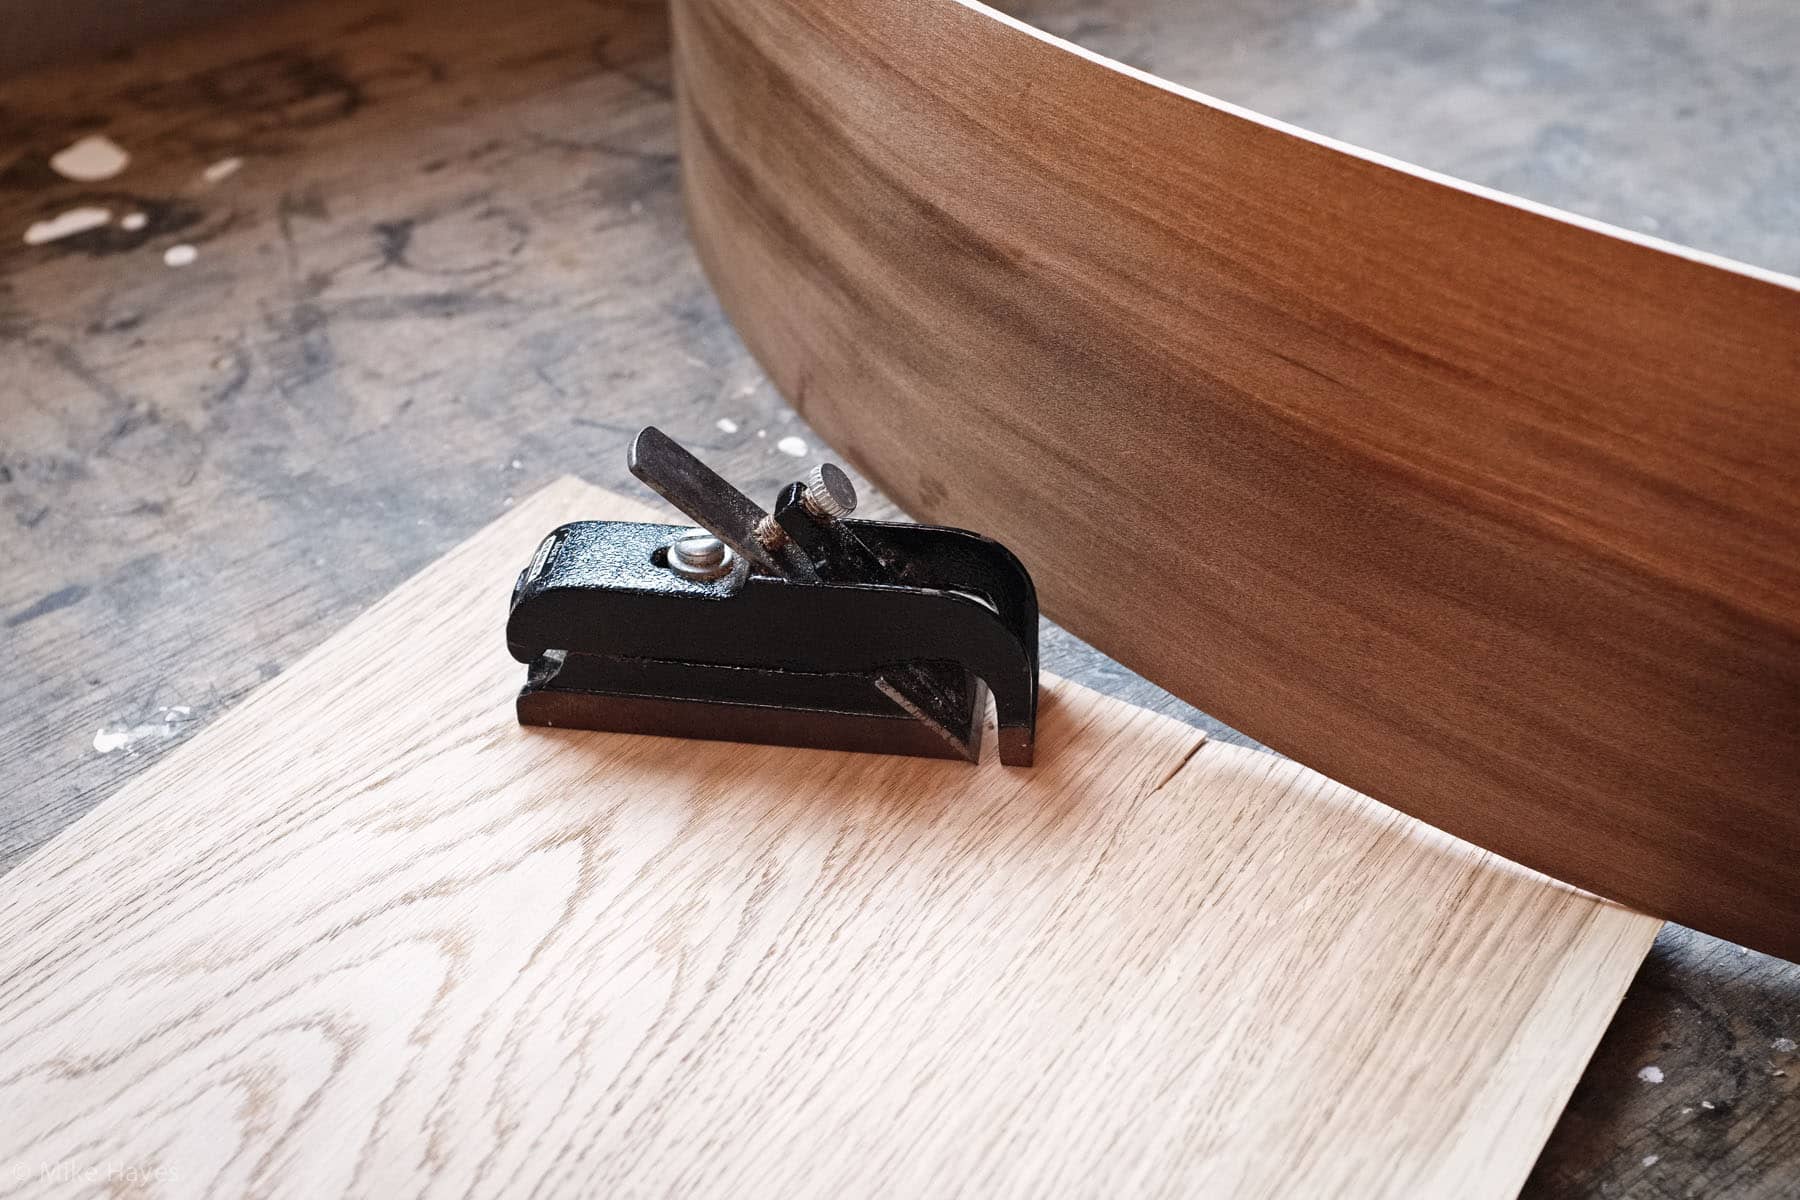
Rough shaping and trimming was done at this stage prior to moving on to hardware fabrication.
Mounting Hardware
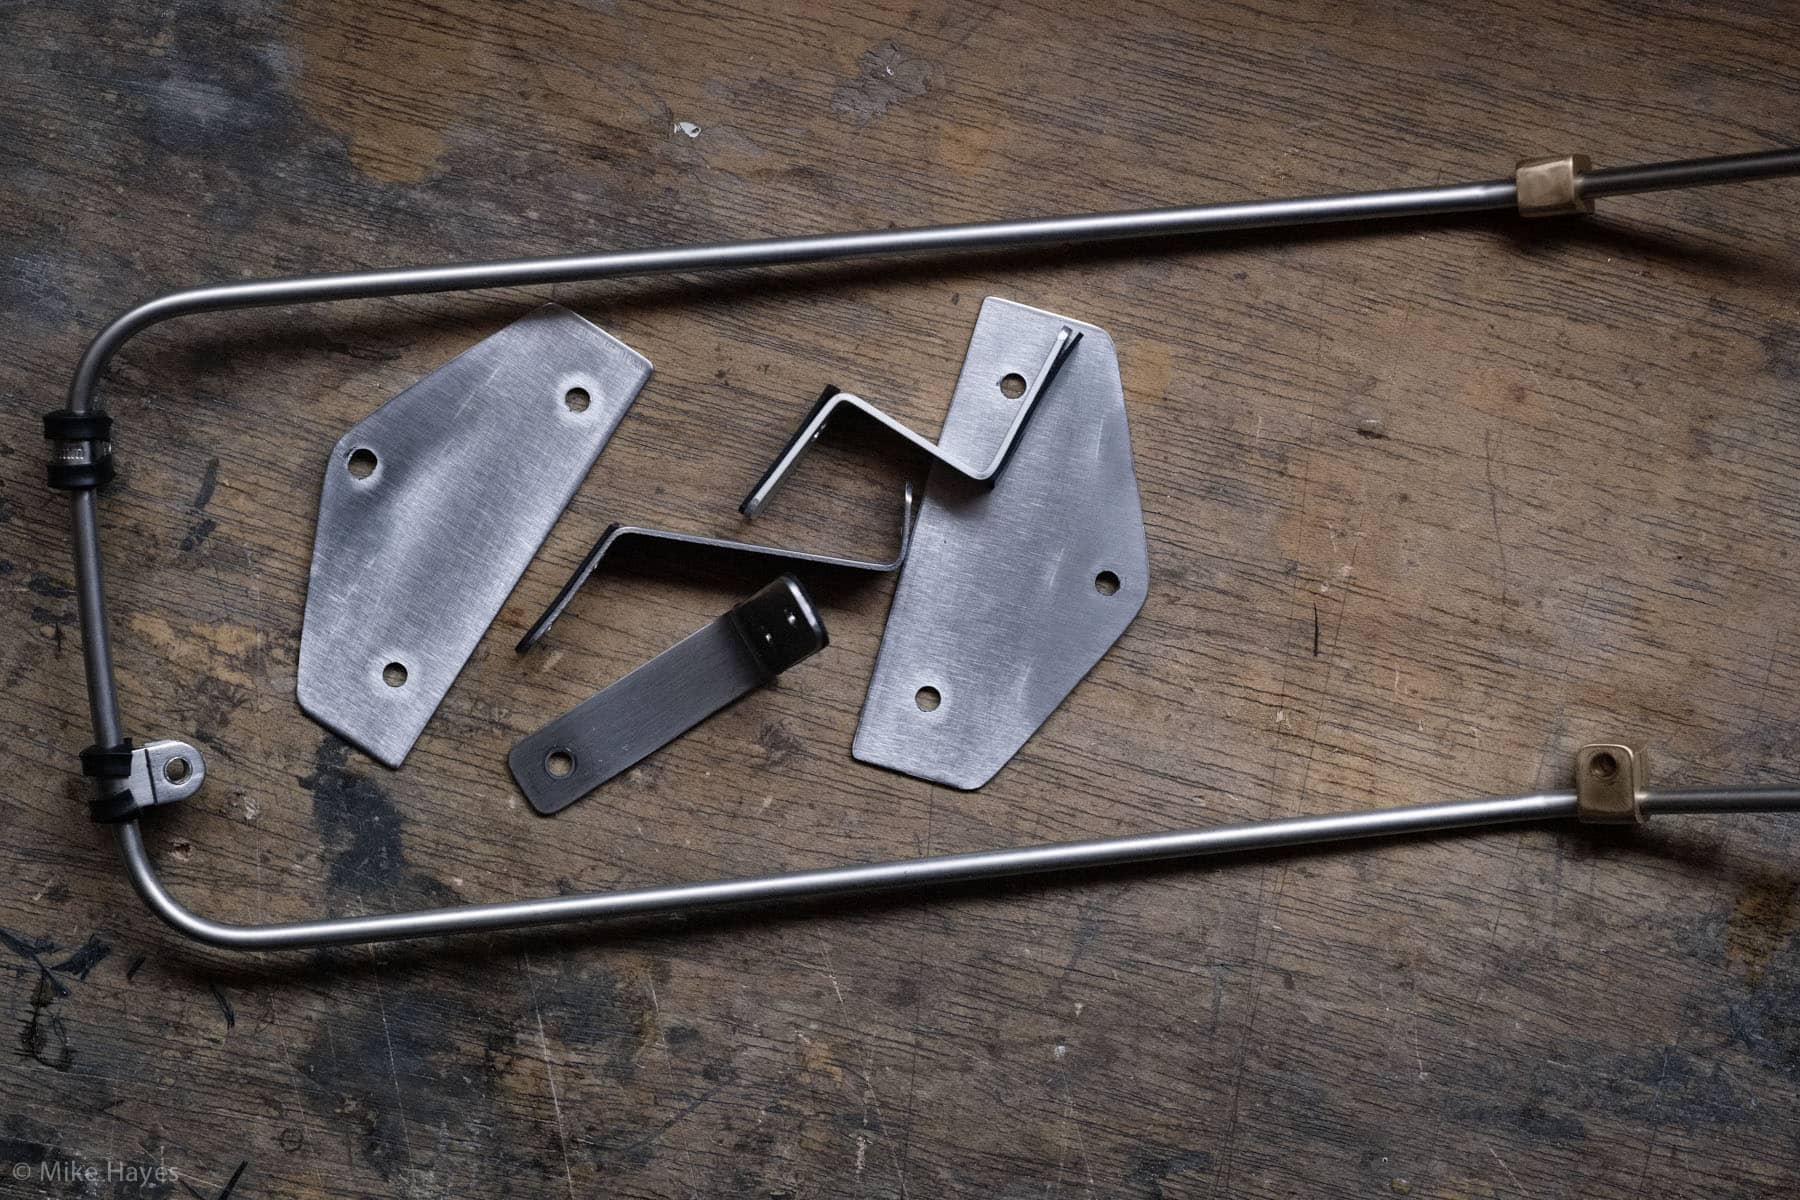
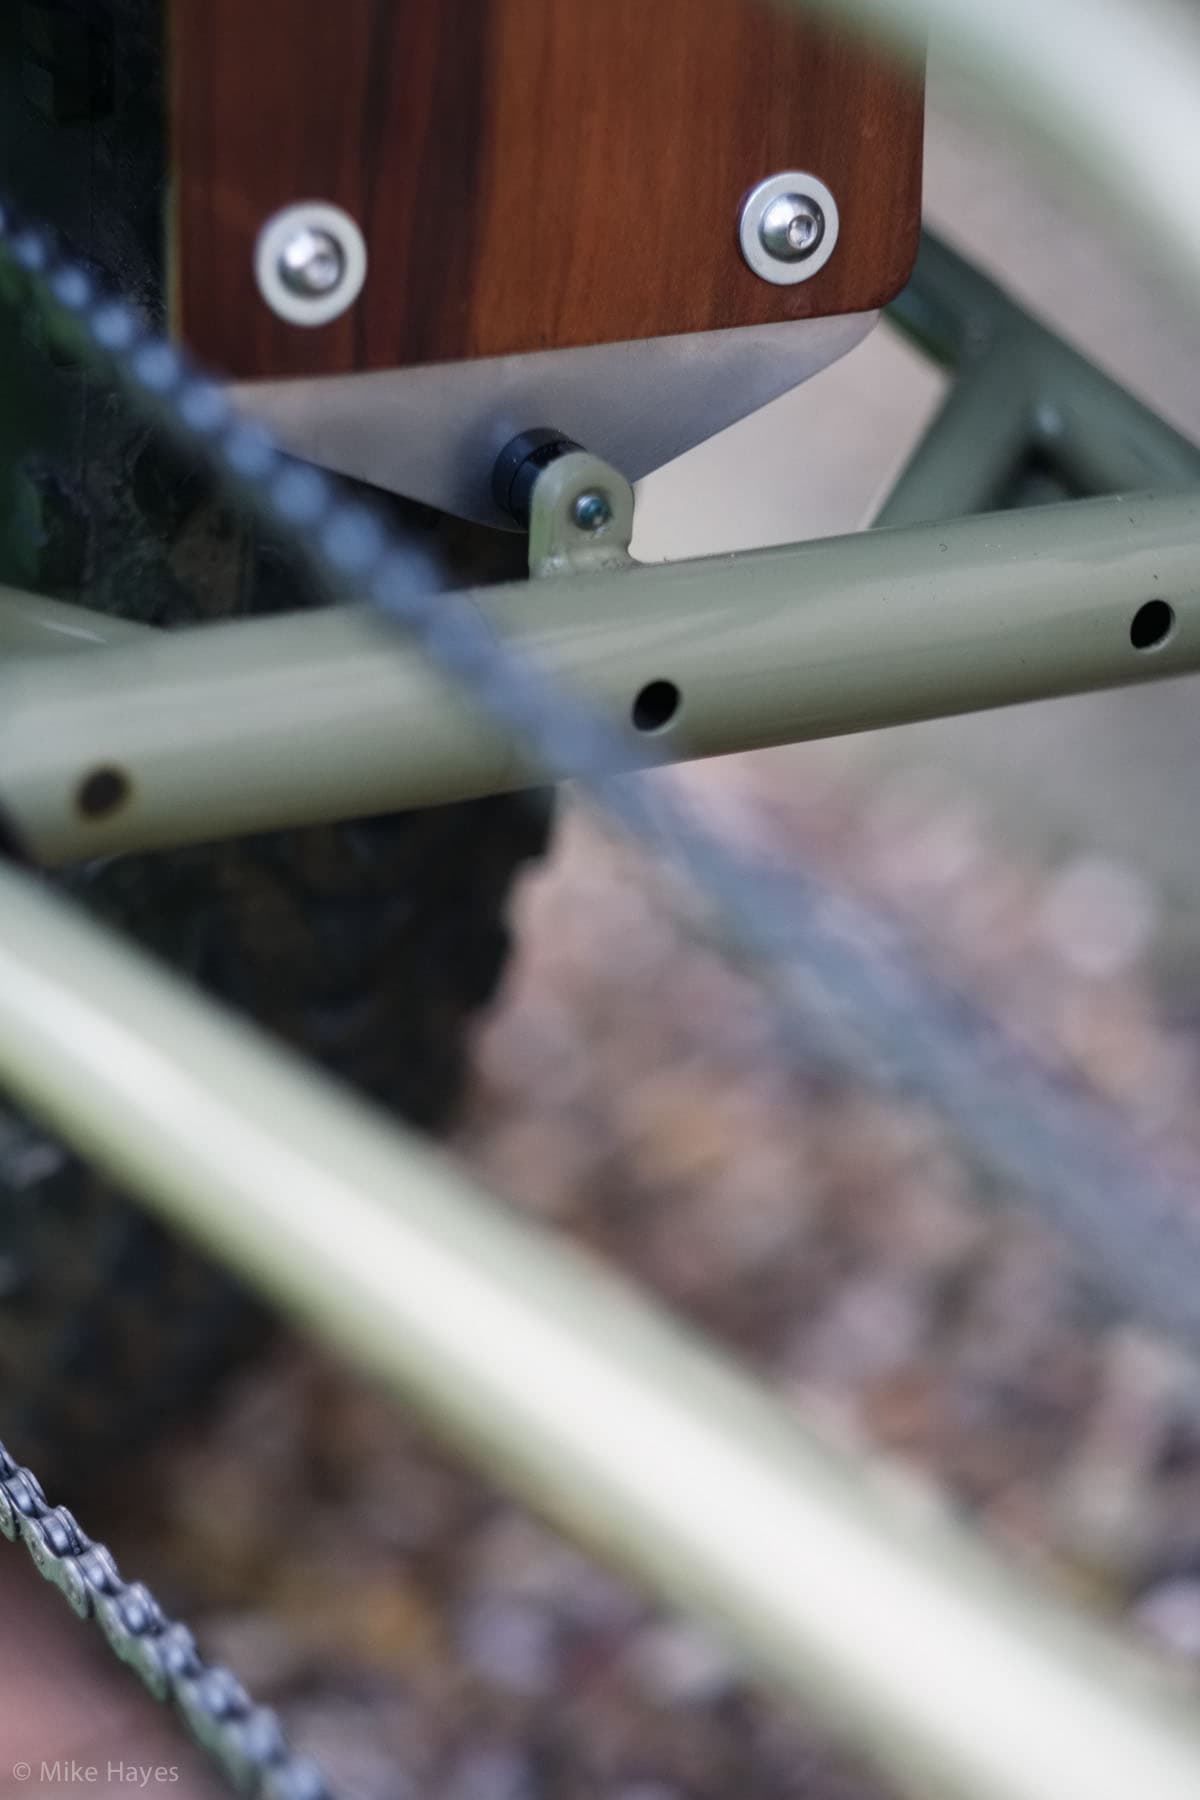
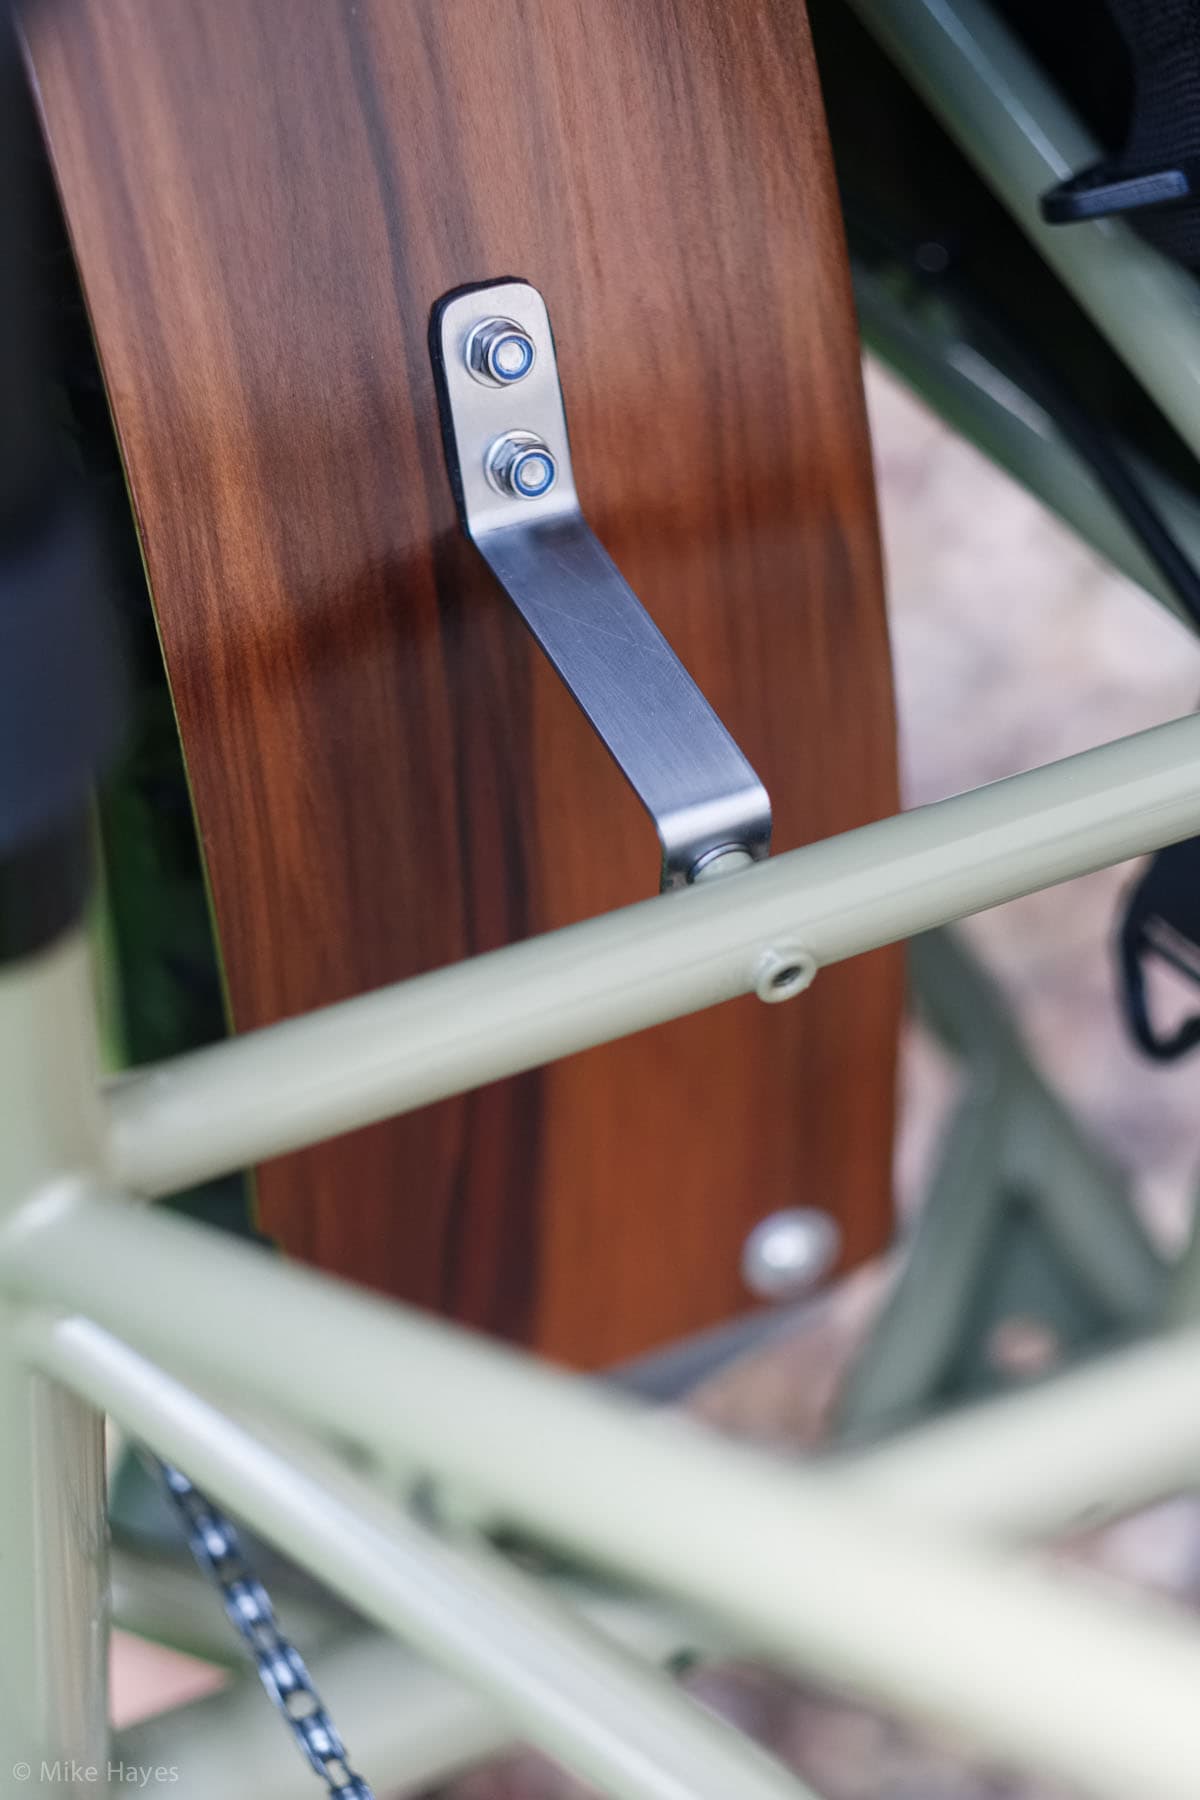
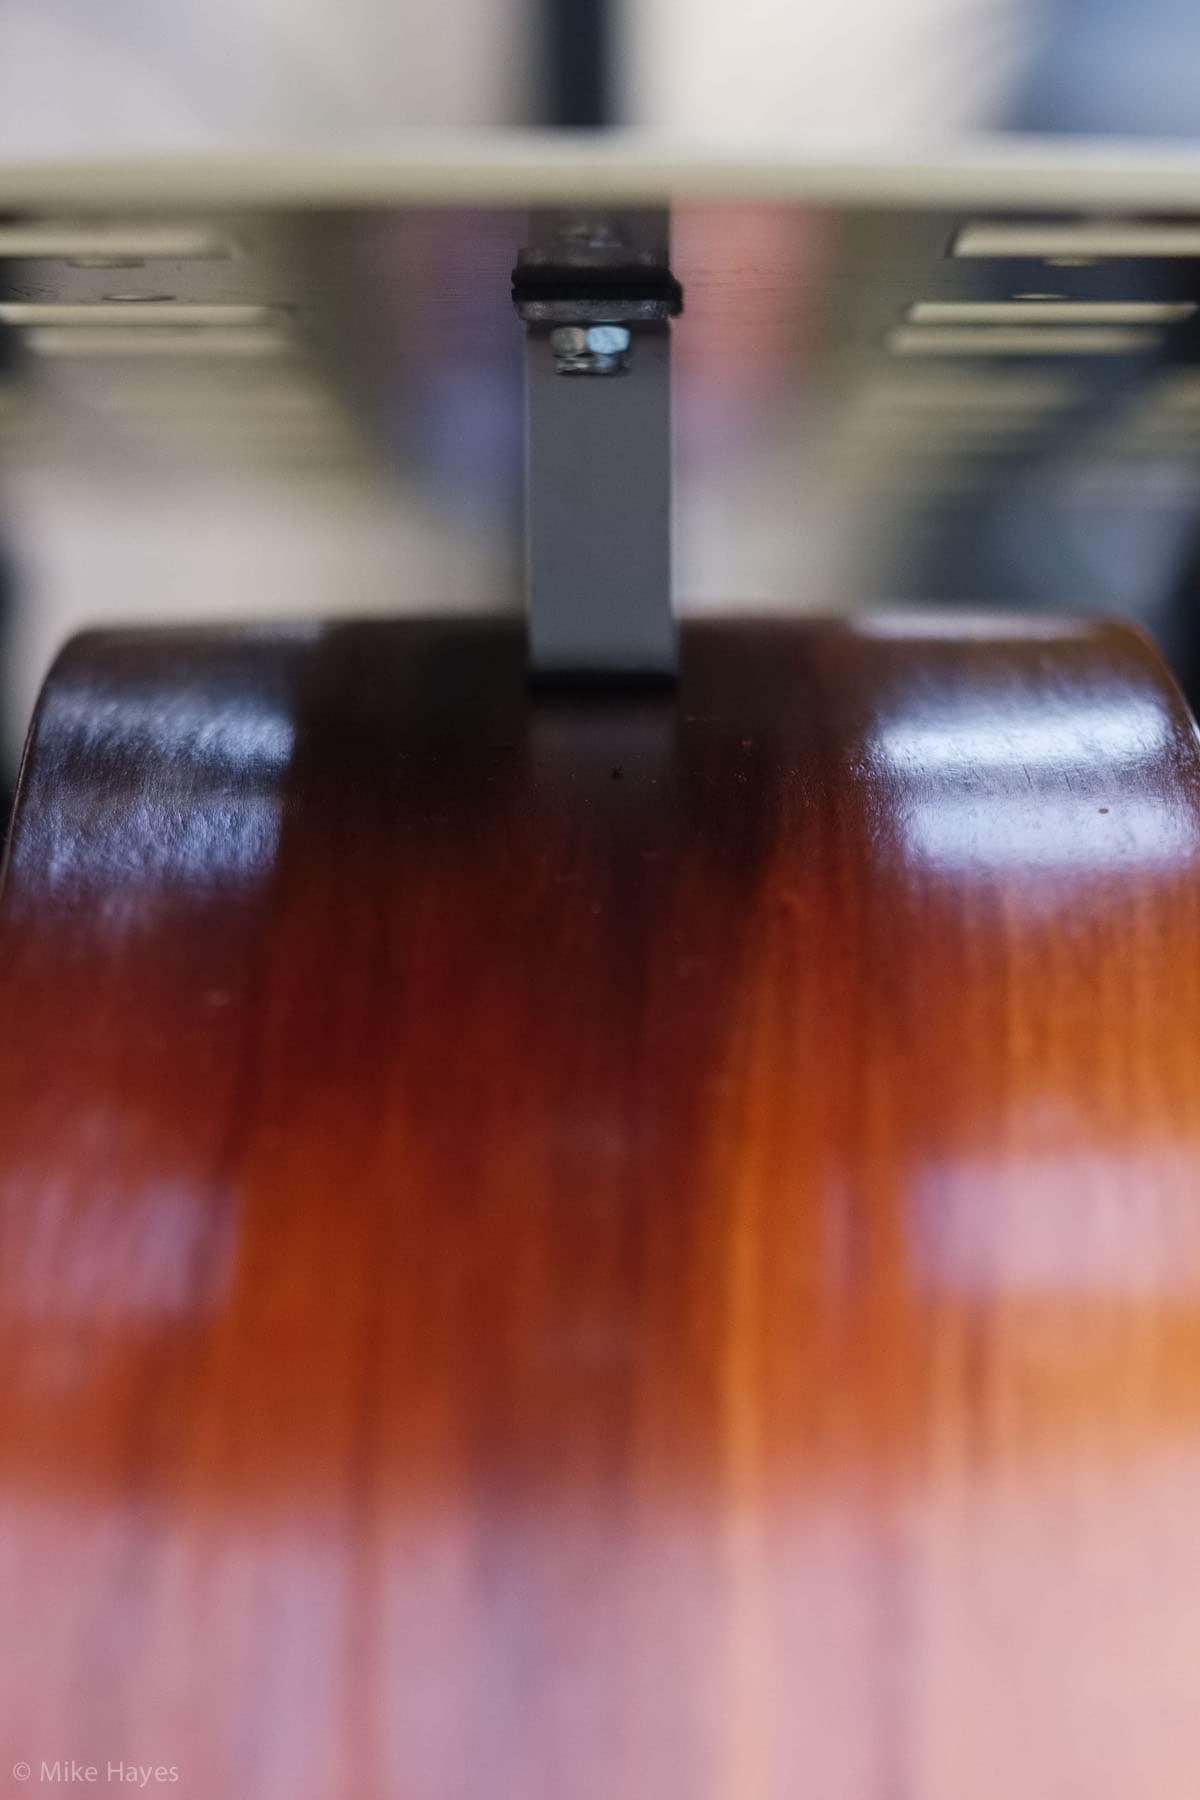
The Dummy being what it is all of the mounting hardware is bespoke, aside from nuts and bolts of course. I made the stays from 6mm OD, 0.5mm wall thickness stainless steel tube, the little brass pinch-clamps for attaching stays to the fork are made from a 12mm square section brass bar stock, and everything else was cut from 1.5mm stainless steel plate. Sorting out the hardware was simply a process of fitting, adjusting, measuring, marking, measuring again, removing, cutting/drilling, fitting.. and so on.
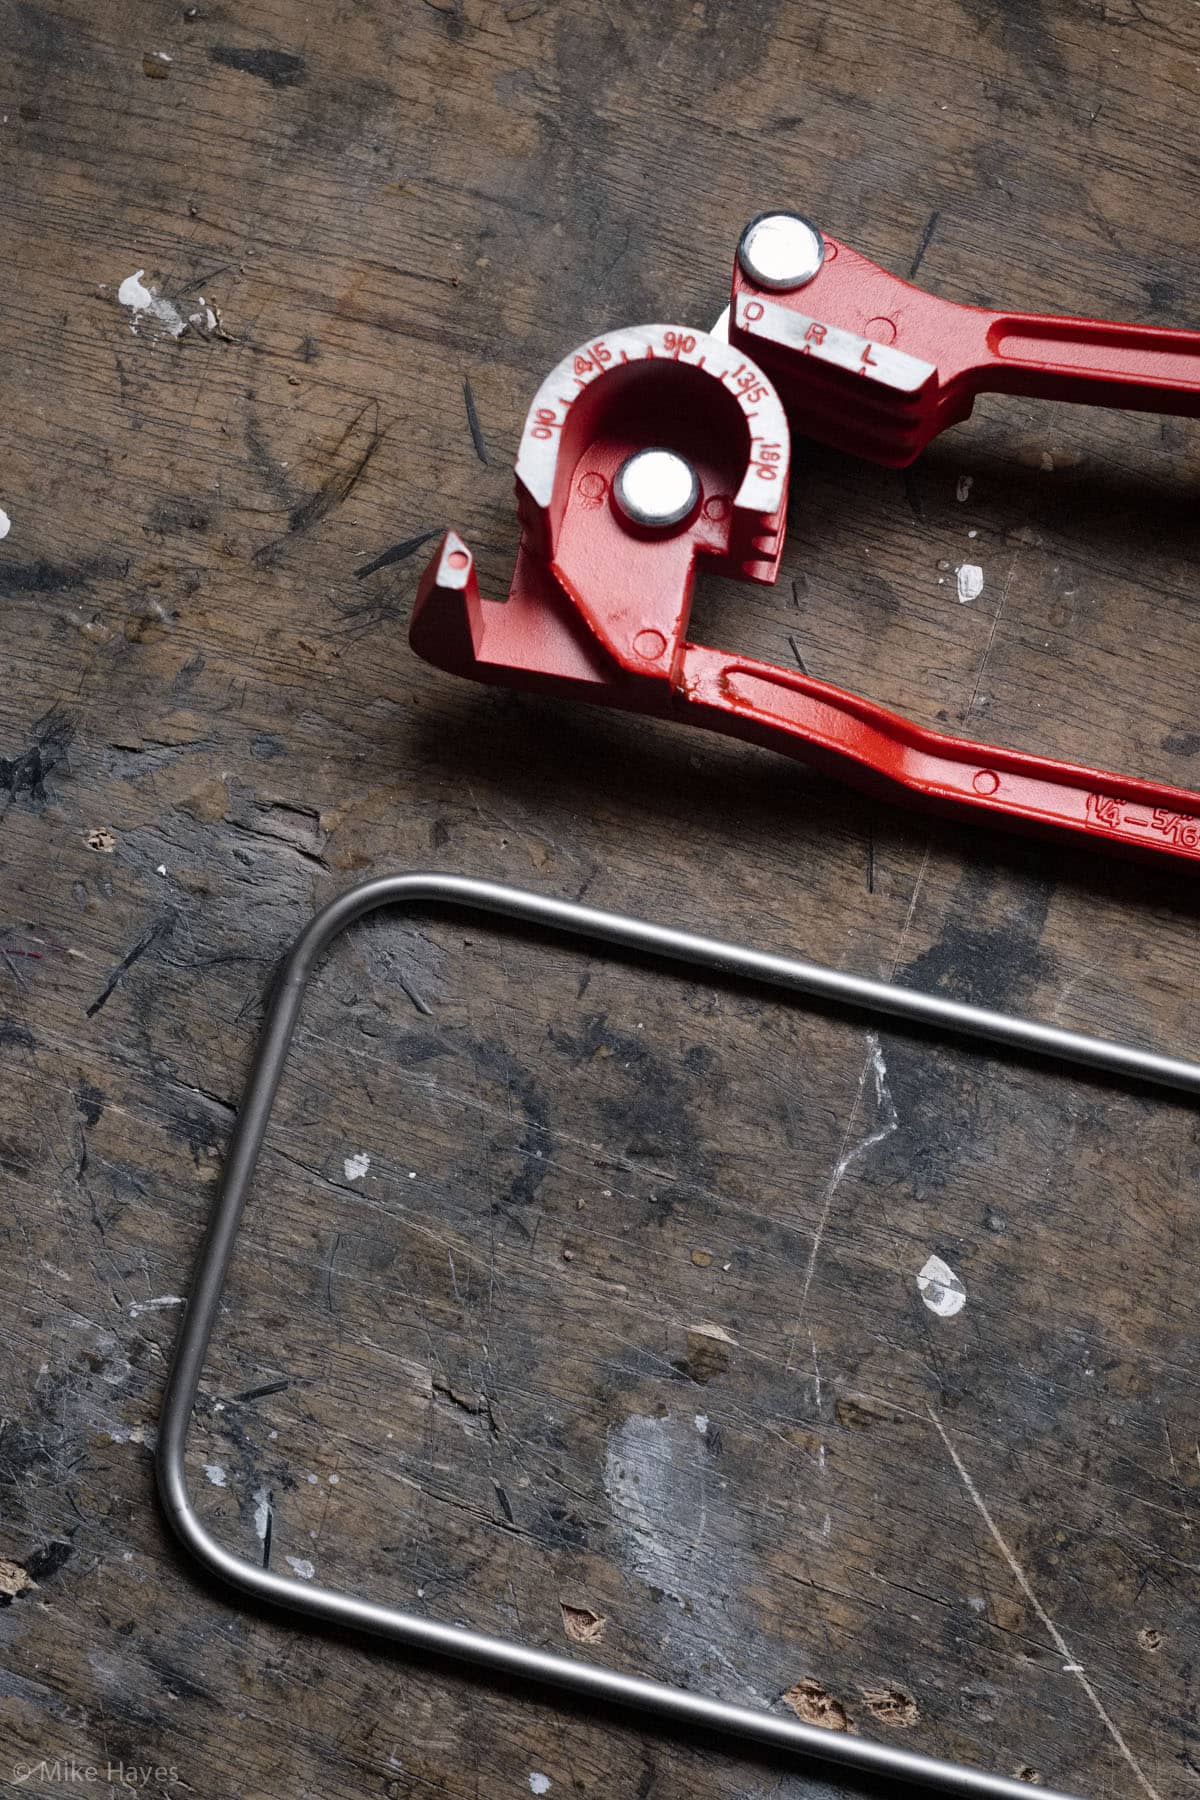
I thought about the stays quite a lot. Stay kits for commercial mudguards are available from the likes of SKS, Velo-Orange, Gilles Berthoud and so on, and they would be a great solution for a road or touring bike setup. The Dummy however needed something stiffer and more robust, as well as longer. Alloy tubing I decided would be too soft. I had some 1mm wall thickness, 6mm OD stainless tubing here for making bag supports but it’s a bit heavy for a mudguard stay, increasing stress on the guard itself on rough terrain. The 0.5mm wall thickness tubing of the same diameter is perfect however – a meter of it weighs about 65grams and is nice and stiff. Stays were bent to shape mainly by eye using a mini tube bender of the sort used for routing brake pipes and so on in the automotive world. You can find them online for a tenner; really handy bit of kit for making bag supports too.
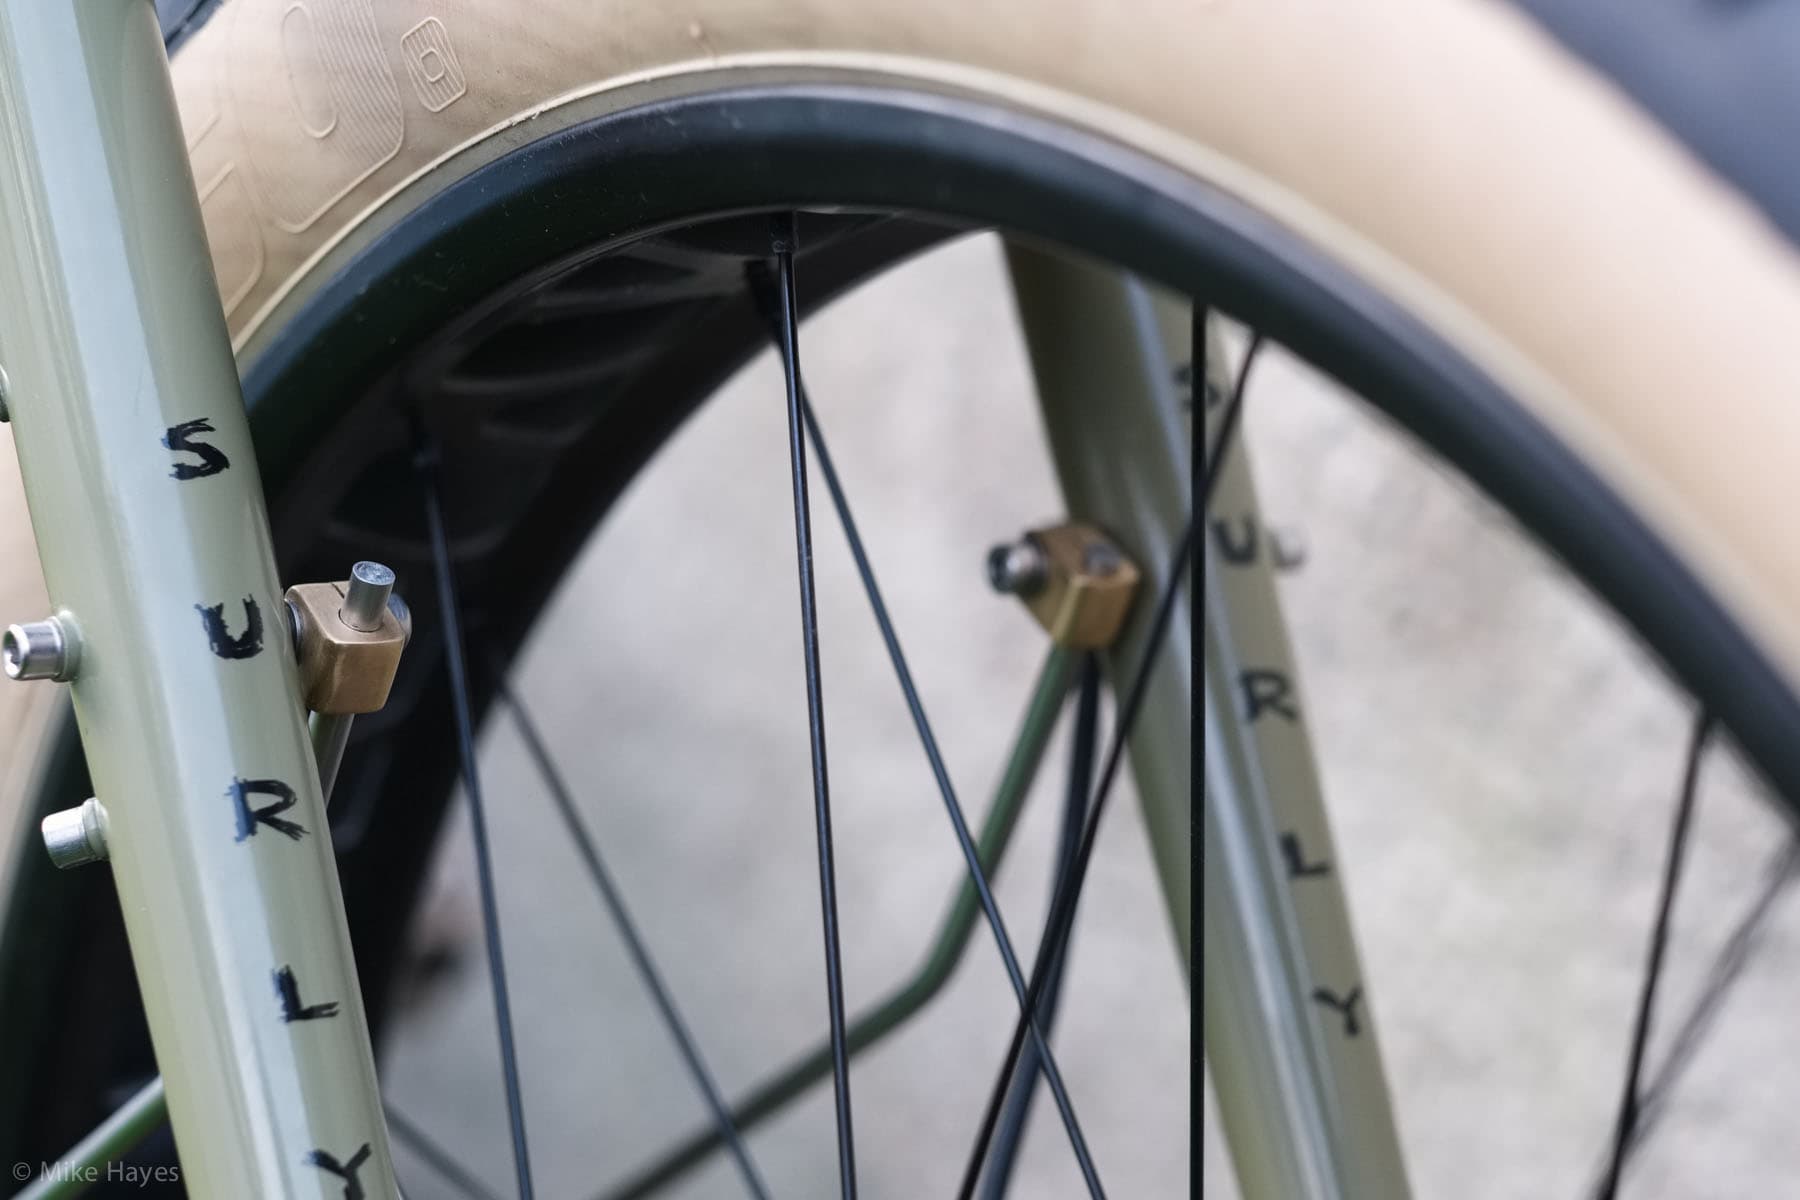
The stay is fixed to the fork using small brass pinch clamps made from some brass bar stock (eBay is a good source for this sort of thing in very small quantities). Really simple – a 6mm hole for the stay, then a 5mm hole for the bolt drilled through perpendicular to, and adjacent to the stay hole, and then simply cut through with a hacksaw to meet the larger of the two holes. Once the bolted to the fork boss and tightened the stay will be clamped up nice and tight. Once cut to length the open ends of the tube were plugged with a drop of hot melt glue.
Finishing
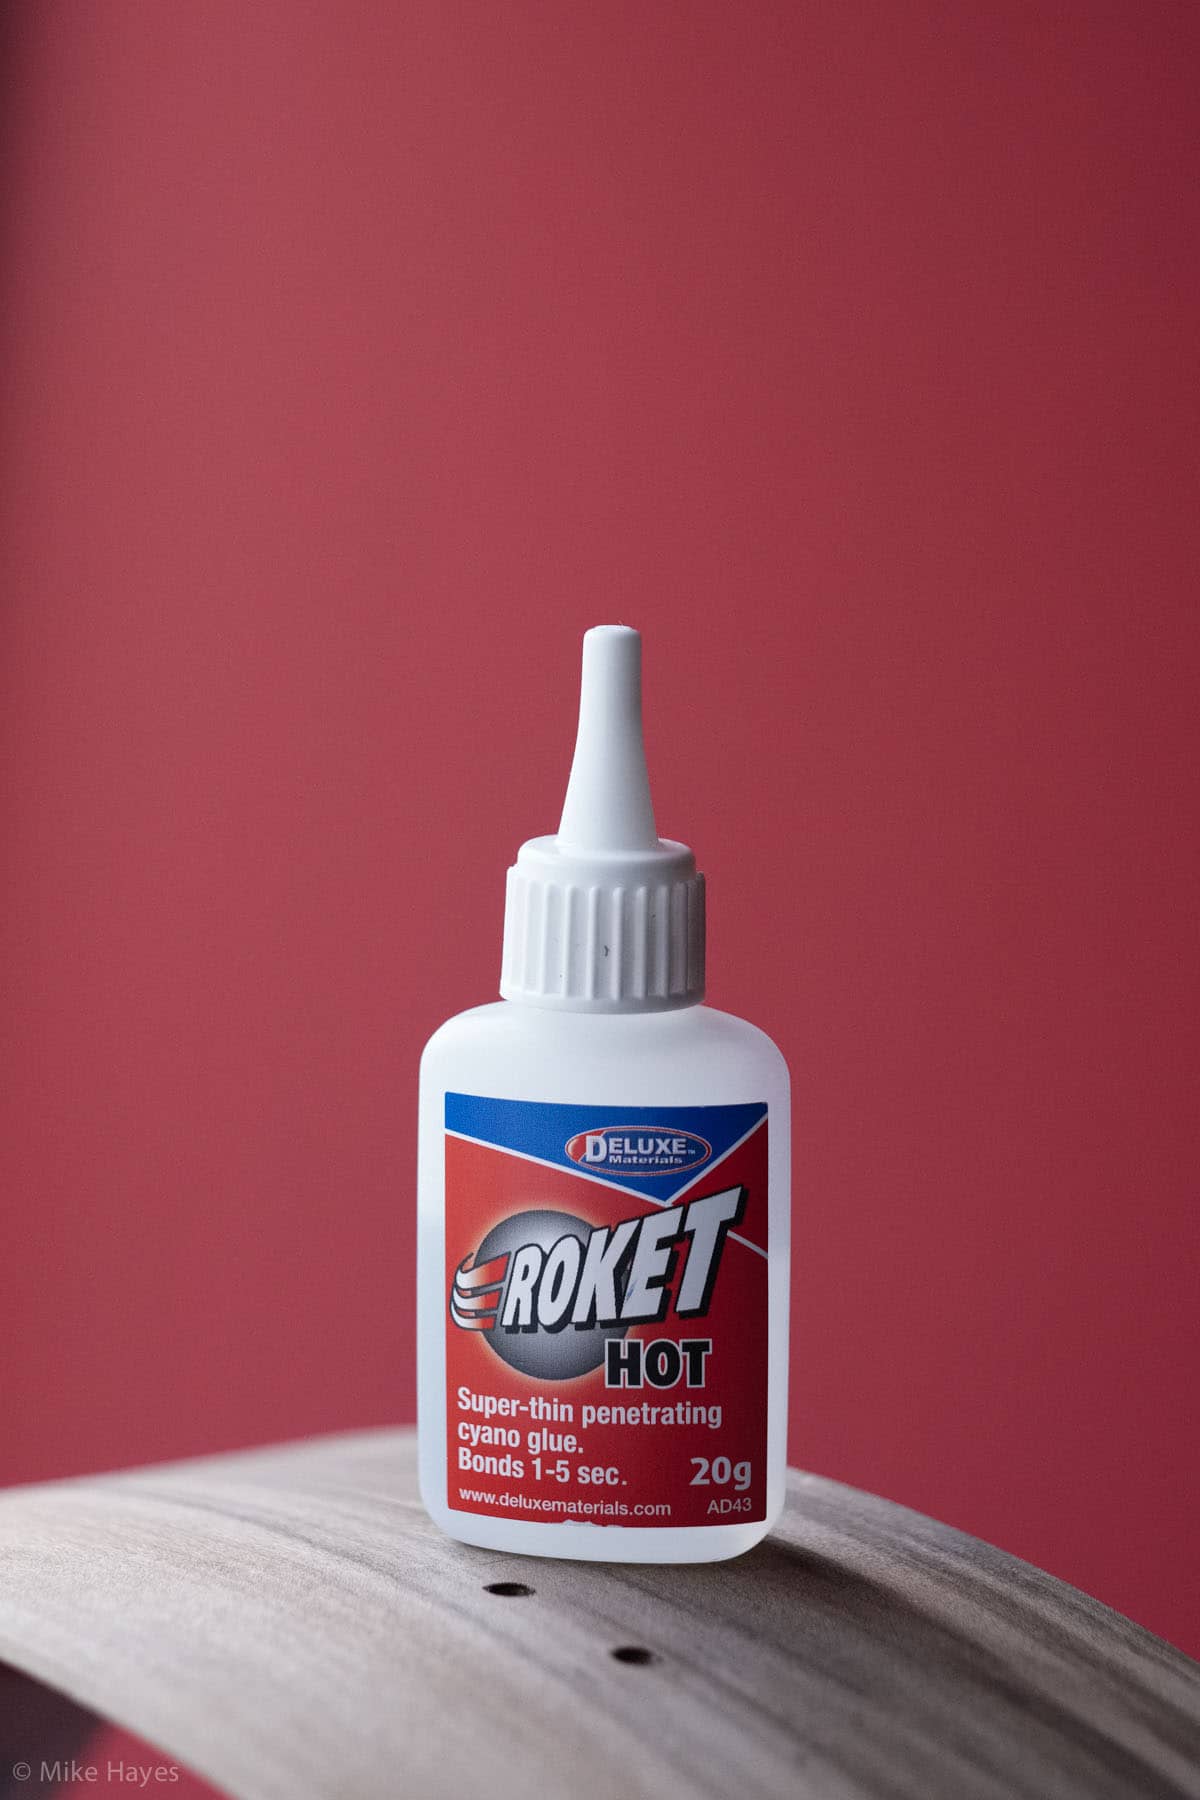
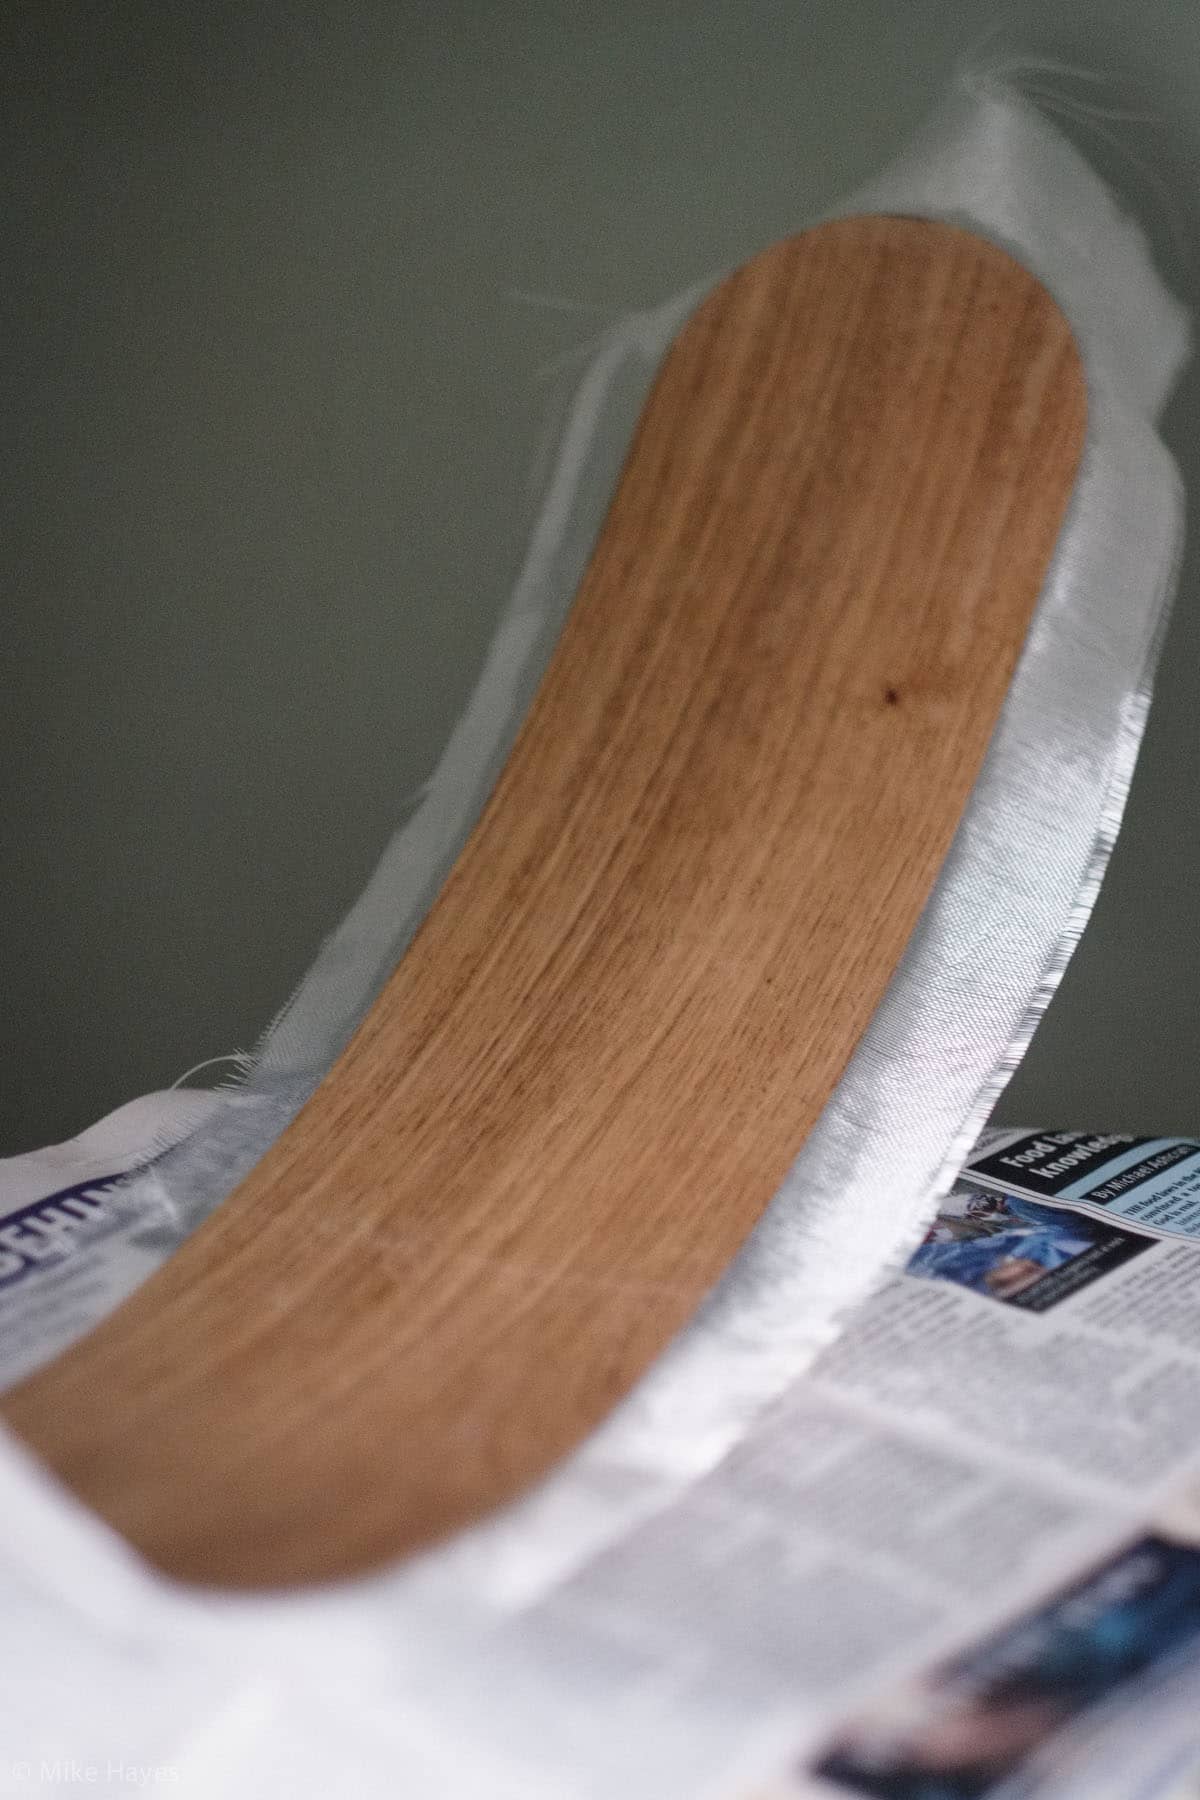
Before final rubbing down and varnishing I gave the inside faces of the mouldings a single layer of 200 g/sqm woven glass cloth and epoxy resin to add toughness and reduce the likelihood of any splitting along the grain. Four coats of satin polyurethane yacht varnish followed with a light rub down between each coat. Temperatures are quite cool at the moment so I could only manage one coat per day but care and patience at this stage always pays off…
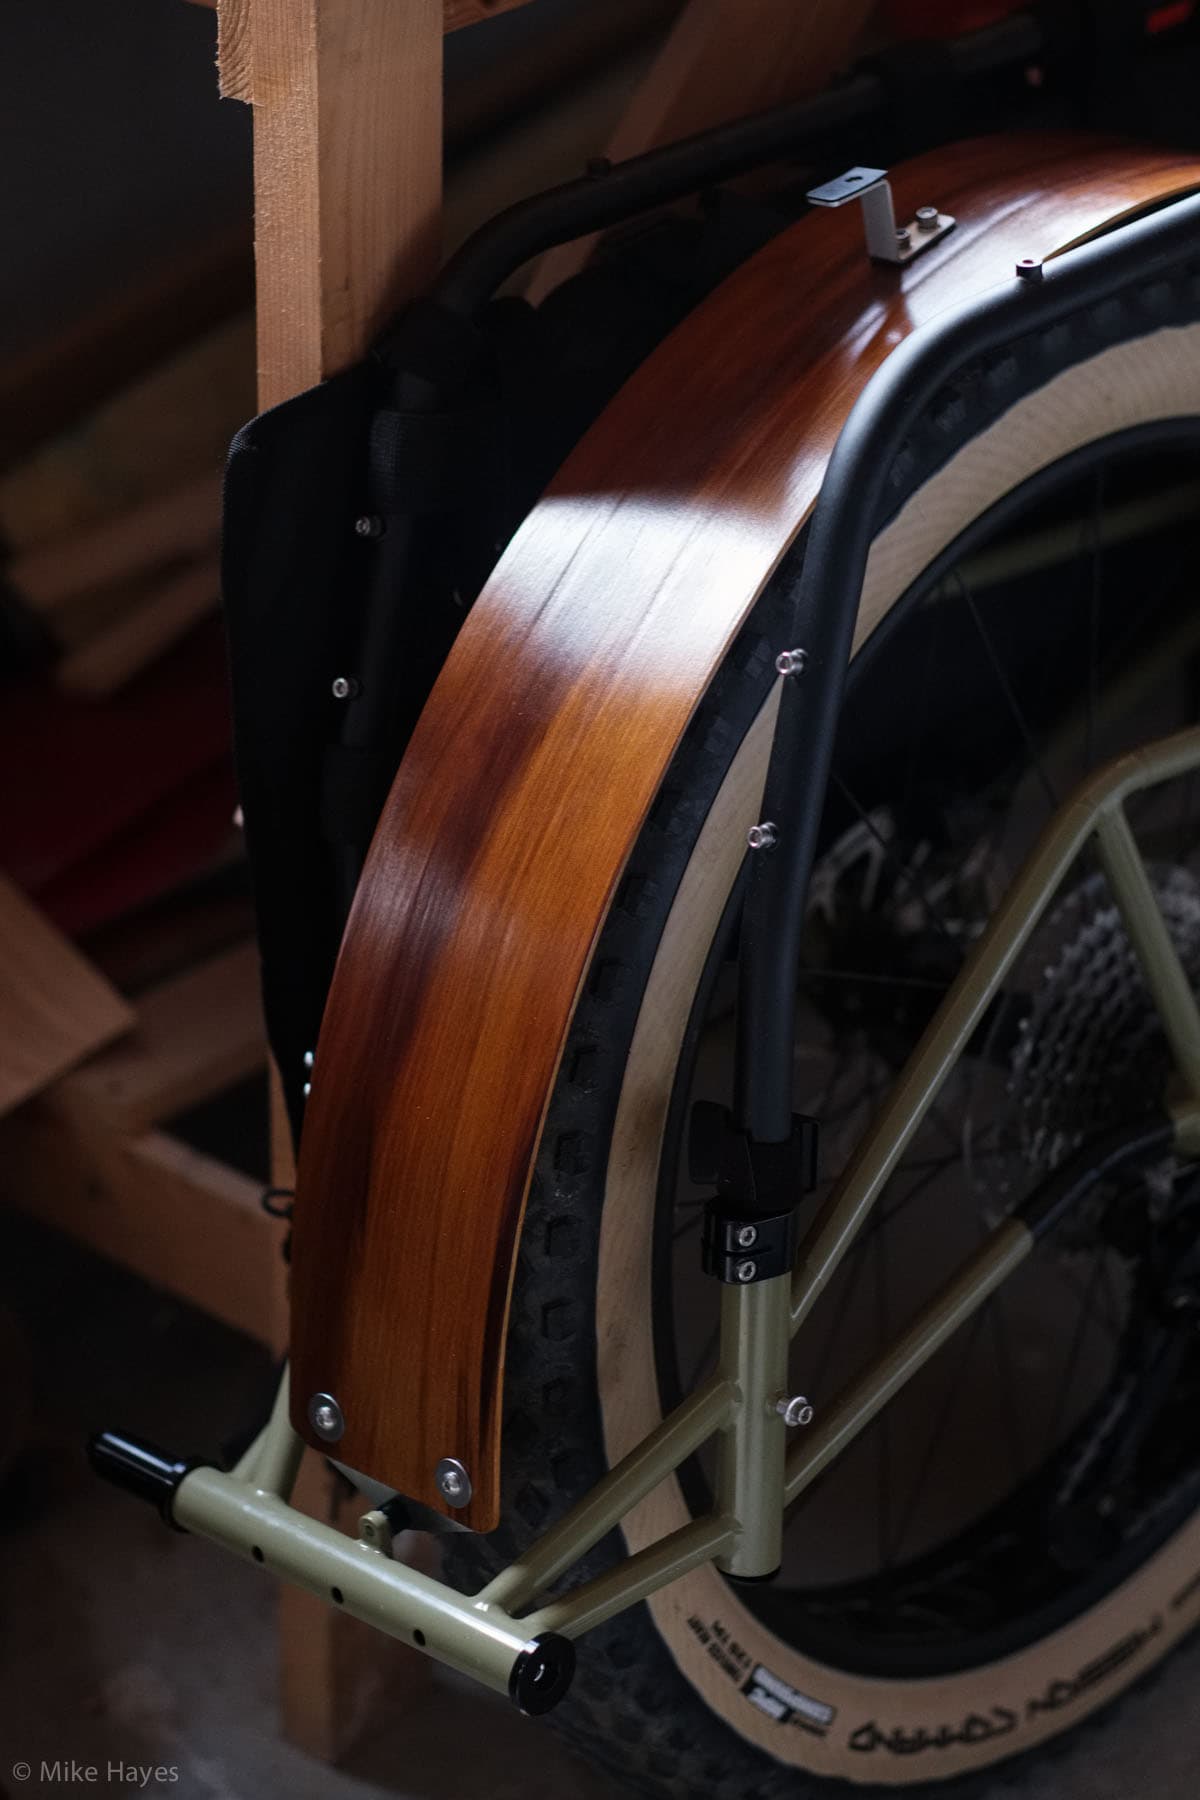
Final Assembly
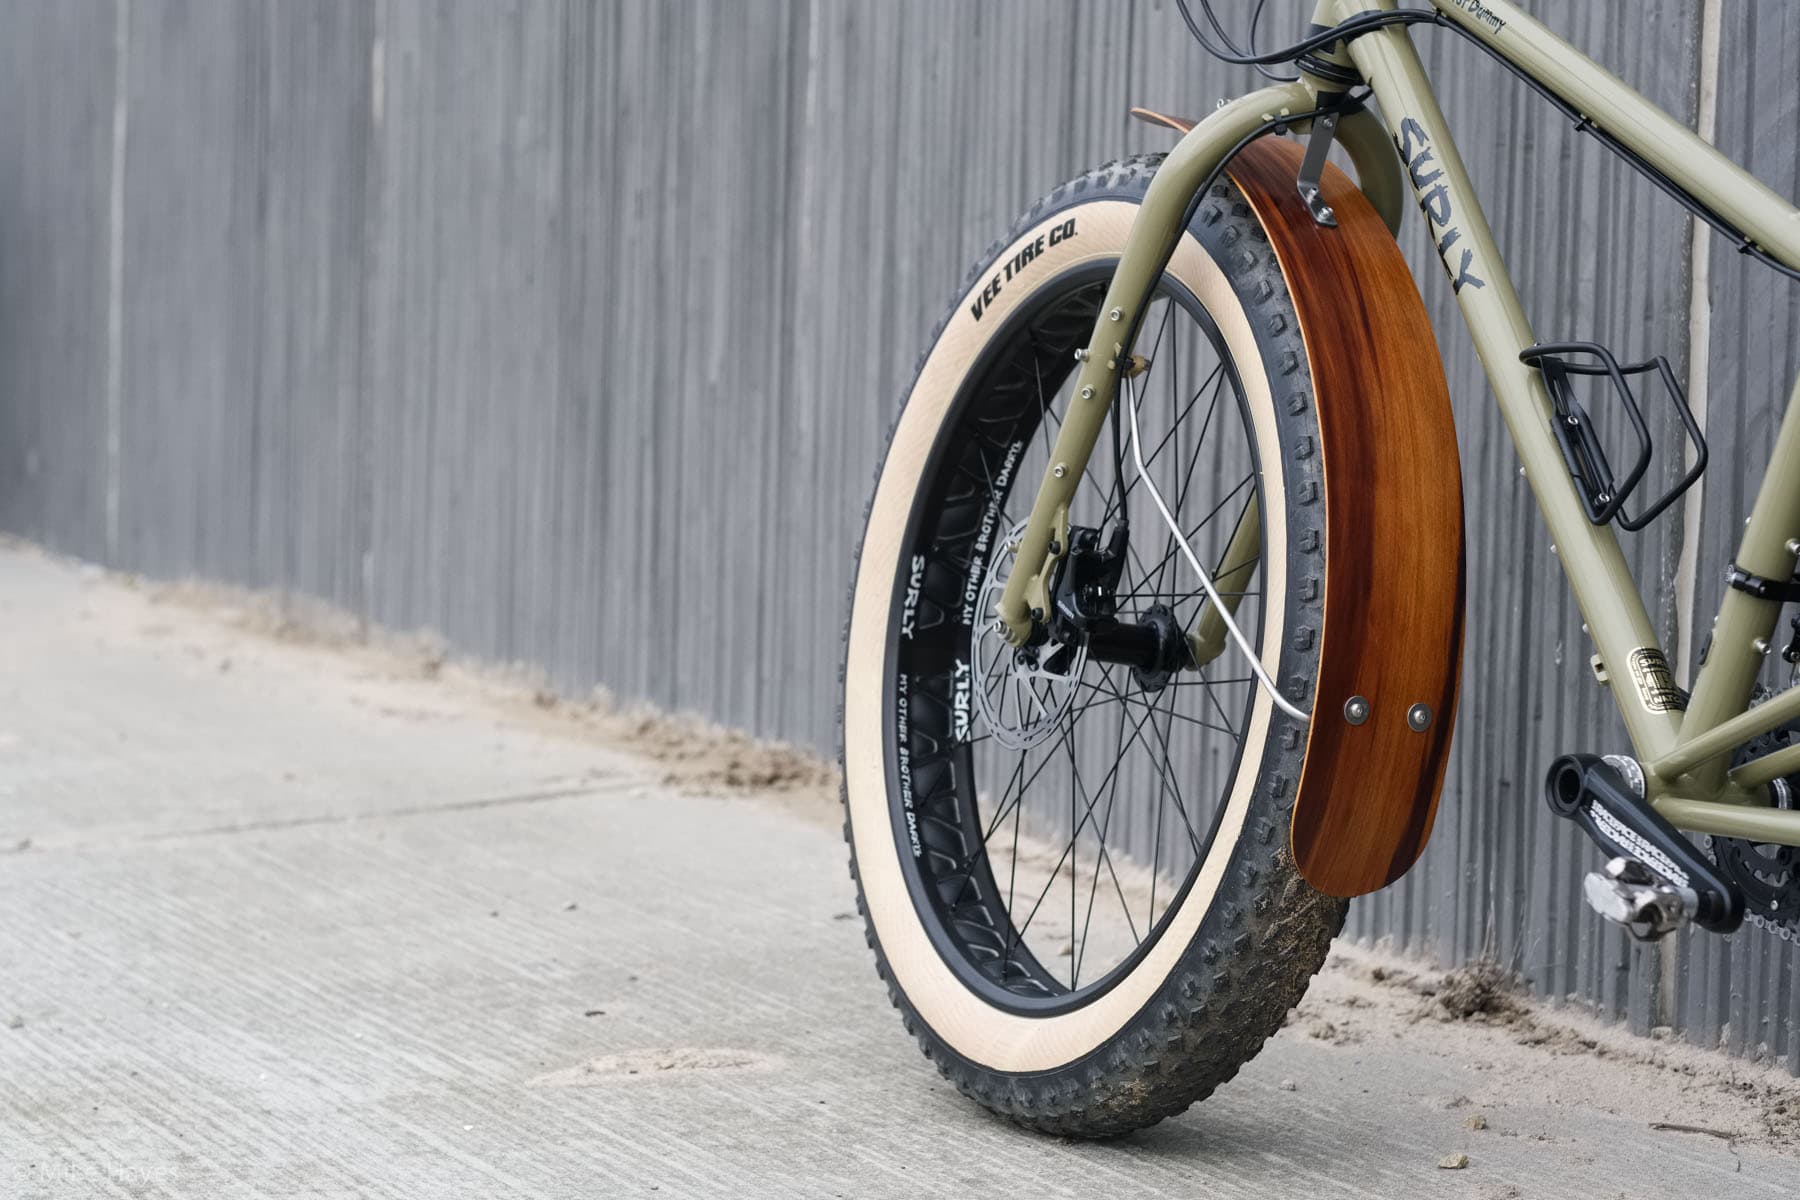
Here’s a bunch of snaps of the finished job. It’s all really straight forward and easy to do, just needs a bit of time.
So there you have it. I might have gone to slightly excessive lengths just to keep myself shit-free but this sort of thing is always worthwhile and doesn’t require any specialist kit. With the exception of a power drill, and a jigsaw for cutting the former, everything was done with a simple selection of hand tools, and a vise. Here’s a list, from memory, in case it’s relevant:
- hacksaw
- coping saw
- stanley knife
- mini hand plane
- mini pipe bender
- steel rule
- carpenters square
- a pencil
- tape measure
- medium and fine metalworking files
- selection of emery papers and sandpapers + sanding block
- handheld electric drill + 5 & 6mm bits
- handheld jigsaw
- screwdriver
Oh there was also a punch + hammer for marking the hole centres in the stainless steel bits.
It will be interesting to see how well they hold up.. they feel tough and work really very well. I took photos and then off for a sloppy lanes ride to collect some rims (Stan’s Baron Mk3) from my LBS for a new touring wheel build.
I need to get back to the bag designs now…


Quality job! This just shows what ingenuity and a bit of time can achieve, a bit less plastic and packaging in landfill and a unique solution to this time of years mudguard dilemma. Keep up the good work.
hey Chris, cheers for the feedback, and taking the time to read! Well worth the time and I think hacking about like this is another way to expand enjoyment of bikes and riding. Well.. it is for me anyway!
That is bleddy smart. I hope you get an order or two!
haha, cheers. They’d have to be quite expensive I think – materials cost + time but you never know, I might do the odd commission….!
This is art .. blended seamlessly with function.
Perfectly stunning!
Too kind! They’re not absolutely perfect, but as a first prototype I’m very happy… and besides they’ll get knocked around. They do make it kind of hard to be anonymous around here on my bike… oh well.
Those turned out beautifully.
Well done.
hey Kurt, thank you sir! Pretty happy. Not perfect but good enough…!
Wow! Beautiful job! I am impressed… Oh, and you should try to ride on “a pink girls bike with ribbons tied to the handlebars”…, it would be a sign of character
hehe, that’s very kind of you. As for the girls bike, well I think that is one case where the n+1 rule finally breaks down….
Hey Mike… super impressive work here. Lovely results too. I’d like to use your opening photo on my blog to reference and link back to your post. I’d like to share your fabulous site with my readers & followers. Photo credits, etc. to be given of course. Let me know your thoughts. Keep up the great work. Cheers! – cm
hey, cheers for the feedback, and bothering to read, hehe! re photo, yeah sure, I’ll email you..!
I found myself glues to your site, Wonderfull job done here
hehe, that’s very kind of you to say so!
The site has been up a long time, since 2004, so there’s a lot of rubbish that I’m slowly getting rid of, and many articles are out of date but such is the nature of the web.
Super sick! Amazing job man! :)
cheers! sadly no more, bike was written off when a driver took a bend too fast, crossed the centreline and hit me.